GTR2
What is GTR 2 – FIA GT Racing Game?
GTR 2 – FIA GT Racing Game is a sports car racing simulator developed by Blimey! Games and SimBin Studios (later Sector3 Studios and KW Studios) and published by 10tacle Publishing in 2006 for the x86 PC. The game is a sequel to GTR. Not only the game simulates the official 2003 and 2004 FIA GT Championship racing series, but also open practice, race weekend, championships, time trials, endurance race events (including Spa 24 Hours) and driving school, with more than 140 high detailed cars from the GT and NGT classes as well as 34 different track-layouts. Since its release in September 2006, the game has received widespread acclaim. Extending the physics engine from GTR, it features realistic physics including steering command by sensitivity, dynamic lighting, damage modeling and 3 different game modes (Novice, Semi-Pro and Simulation). [1]
Why a game from 2006?
- GTR2 was one of those rare occasions when a game developer was given the opportunity to produce a game as it was meant to be.
- All the features you see in one game or another, but never all in one game, were actually included in one game: GTR2.
- Now, two decades later, modders are still updating and improving the GTR2 experience.
- New cars and tracks, DXVK, ReShade, modern CCGEP SF FFB, RealFeel FFB, Leo FFB, Real Weather, Wipers, DRS, SimHub integration, and more.
- GTR2 is still moving forward with every cylinder firing.
Still Beloved and Critically Acclaimed
Here's why a game from 2006 still holds its own.
Highlights:
- GTR2: Why are Modern Sims Still Not as Good? [Article] - Paul Jeffrey (2017)
- This is Still the Gold Standard for GT Racing Sims [Video] - SimRacing604 (2024)
- Still The Greatest Racing Sim Ever, Here is Why [Video] - EmptyBox (2023)
- GTR2 At Its Best Looking 2023 [Video] - Shovas (2023)
- GTR 2 - This is what immersion feels like [Video] - Jimmy Broadbent (2015)
All The Praise:
- GTR 2 20-Year Retrospective - Project Motor Racing's Older Brother [Video] - Cav's Sim Racing Encyclopædia (2025)
- This game is AMAZING [Video] - SpikeHartGT - 24h Spa in 1 hour (2025)
- The BEST Racing Game You've Never Heard Of [Video] - AR12Gaming (2024)
- GTR2 Meets Motion Sim Racing - Immersive GT Racing Like Never Before [Video] - SimRacing604 (2024)
- Optimized Vanilla GTR2 At Its Best Looking 2024 [Video] - Shovas (2024)
- This Old Sim Title Still Impressive In 2024! [Video] - Aubrey Coleman Racing (2024)
- GTR 2: What Is It Like In 2024? [Article] - Yannik Haustein (2024)
- GTR 2 is Still Amazing [Video] - ARIE (2024)
- What Happened to GTR 2? [Video] - ThePurpleguy123 (2023)
- How GTR 2 and GT Legends are still viable sim racing options today [Article] - Ross McGregor, Traxion.gg (2022)
- GTR2 Still Rocks [Video] - GPLaps (2022)
- GTR2 in VR is AMAZING (Thanks Crew Chief) [Video] - Rampski (2022)
- Power & Glory | GTR-2 Mod | Still Amazing In 2022! [Video] - Aubrey Coleman Racing (2022)
- Thoughts on GTR2, And Why I Look At Sims Differently Now [Video] - SimRacing604 (2021)
- GTR2: Is It Still Good on Modern Equipment? [Video] - Paul Jeffrey (2019)
- When will GTR2 be dethroned as the most 'complete' sim? [Thread] - Interesting Reddit Discussion (2019)
- GTR 2 - How Does It Feel With A Direct Drive Wheel? [Video] - Jimmy Broadbent (2018)
- GTR 2 - The Sim That Keeps On Giving [Video] - Jimmy Broadbent (2017)
- GTR2: 10 Year's Later, Still Fun? Yep. [Video] - Derek Moore (2016)
Articles:
- GTR 2: Realism Redefined (Backup Link) [Article] - John B. Marine (2016)
- Interesting "AI Racing" section about fully AI controlled sessions
- IGN GTR 2 Review [Article] - Randy Magruder (Oct 2006) - Rating: 9.2 / 10
- IGN GTR 2 Preview [Article] - Dan Adams (Sep 2006)
- IGN E3 2006: GTR 2 Preview [Article] - Tom McNamara (May 2006)
Videos:
- Windows XP Gameplay: GTR 2 FIA GT Racing Game [Video] - Windows XP Gameplay (2025) - "Windows XP Gameplay playing on GTR 2 FIA GT Racing Game at 1080p resolution high settings. Original disk copy of the game."
Community
Overview:
- GTR2 still has an active community mostly around forums, mods, and modding but some online racing leagues still exist.
- Some forums have valuable mods but are private and mainly cater to modders. You can improve your chances of getting access by publishing your own mod on public forums, such as Overtake.gg, to establish your reputation as a modder.
How to get involved:
- Start contributing back to the community to build your reputation
- It almost doesn't matter how trivial you think your contribution might be, what matters is that you're seen as someone giving back to the community and not just only taking
- Your contributions might be as simple as documentation, building championship GDB files, class GDB files, PLR tweaks, FFB settings recommendations
- As soon as you start learning about even the simple things, you'll start learning about more complex things and that will help you graduate to more complex modding, eventually
- Publish your mods on public sites, to begin with, such as OverTake, Simwiki Forums, other GTR2 forums, or your own webpage (perhaps a free WordPress site)
- This is one way to help increase your chances of being allowed into private forums
Forums:
- OverTake (Formerly Race Department) - News, forums, hosted downloads, modders
- Reddit - Forum about GTR2
- eSport-Racing.de - Curated, hosted downloads
- Trackaholics - Forums, linked downloads, modders
- European Endurance Center (GTR2 Endurance) - Forums, linked downloads, modders
- Evolution Modding - Forums linked downloads, modders. Evolution-modding.net domain stopped working in 2025.
- Koelschbierbude.de - Forums, hosted downloads, online racing leagues. View the site in English language with the English flag icon at the top.
- Festbierbude - Focused on GTR2 Power & Glory Mod - Forums, hosted downloads, online racing leagues. View the site in English language with English flag icon at the top.
- Historic Simracing Organization
- Classic Motorsport Hub - Community, forums, and league focused around rFactor 1 but has some GTR2 interest
- GTR24U Scott Huhn Designs
Extra:
- fora - Modding fora list for various sims [Forum]
- Impressive list of forums, sites, and discords for various sims including GTR2
Discords:
Modders:
- Pawel Mods
- Neel Jani's Forum - Neel is a prolific modder
- SJ Modding Site and Forum
- FRM - FURI Race Mods
- Speedster63 Site - GTR2 and GTL
- RMS GT Racing
- Group 5 mod by Brickyard Legends Team
Not GTR2:
- Sim Racing Mirror Zone - Forums, linked downloads
Defunct:
- F1 Classic - Forums, linked downloads (Defunct 2025)
- Old url still works but inactive and locked: https://f1classic.forumotion.com/.
- F1 Classic moved to F1 Classic Discord in 2025.
- International Sim Racing (Defunct?) - Forums, linked downloads
- Old URL for Sim Racing Mirror Zone - Forums, linked downloads
- NoGripRacing.com - Forums, hosted/linked downloads
Highlights
GTR2 Best of the Best
- GTR2 Best of the Best - Mods that reach S-tier status, go the extra mile, and are worth your time to download and install
GTR2 Combos - Enjoyable Car and Track Combos
- GTR2 Combos - Enjoyable Car and Track Combos
Modernizing GTR2 with the Crew Chief GTR2 Enhancements Plugin: Tweaks, Fixes, DXVK, ReShade, RealFeel FFB, Wiper Patches, Real Weather, Perfect Mirrors, and more
- Modernizing GTR2 with the Crew Chief GTR2 Enhancements Plugin - Tweaks, Fixes, DXVK, ReShade, RealFeel FFB, Wiper Patches, Real Weather, Perfect Mirrors, and more
Why you should try the GTR2 Get Real Physics Mod
The GTR2 Preservation Project
Getting Started
Getting the Game
- Steam is probably your best bet. Head over to the GTR2 store page and pick up the game. It's pretty cheap but offers amazing bang for buck.
- The SimBin Mega Bundle is the best deal on sale: It comes with GTR2, GTR1, GT Legends, and Race 07 and all its DLCs.
- You might be able to find this on other digital distribution platforms, as well, and save even more.
- Eg. Humble Bundle, Green Man Gaming, Gamers Gate, and of course cd key sites
- I can vouch for Humble Bundle, Green Man Gaming, and Gamers Gate, as I've made purchases there, but I haven't tried CD key sites, although some people find them valuable
Windows XP/Vista/7/10/11+ Compatibility
Try GTR2 first. If GTR2 is running fine for you, no need to worry about this section.
GTR2.EXE and GTR2Config.EXE Compatibility Modes
- Steam
- GTR2.exe > Properties > Compatibility > Check "Run as Administrator"
- Gotcha: Steam GTR2.EXE requires "Run as Administrator" enabled but Crew Chief GTR2 Enhancements Plugin (CCGEP) requires "Run as Administrator" disabled
- GTR2Config.exe > Properties > Compatibility > Check "Run as Administrator"
- Do NOT set a Compatibility Mode on either GTR2.exe or GTR2Config.exe
- GTR2.exe > Properties > Compatibility > Check "Run as Administrator"
- Steam with Crew Chief GTR2 Enhancements Plugin
- Do NOT set either Run As Administrator or Windows Compatibility modes on GTR2.exe or GTR2Config.exe
- If using DXVK: GTR2Config.exe functionality can be replaced by new GTR2.exe command-line switches and dxvk.conf
- If you're having issues or want to learn more check the plugin manual or Modernizing GTR2 with the Crew Chief GTR2 Enhancements Plugin
- Disc
- GTR2.exe > Properties > Compatibility > Check "Run as Administrator"
- GTR2.exe > Properties > Compatibility > Set "Windows XP SP3" Compatibility mode
- GTR2Config.exe > Properties > Compatibility > Check "Run as Administrator"
Compatibility Modes and Crew Chief GTR2 Enhancements Plugin
- Disable GTR2.EXE "Run as Administrator" Compatibility
- GTR2.exe > Properties > Compatibility > Check "Run as Administrator"
- Steam GTR2.EXE requires "Run as Administrator" enabled but Crew Chief GTR2 Enhancements Plugin (CCGEP) requires "Run as Administrator" disabled
GTR2 and Windows 10/11+
- Install additional DirectX End-User Runtimes (June 2010) (Direct Download)
- Comment indicating mandatory on Windows 10/11+
- This is also the fix for any errors about a missing d3dx9_43.dll
- Alternative for d3dx9_41.dll missing error: DirectX End-User Runtime Web Installer
- Although the installer appears to accomplish the same goal
GTR2 and Windows 11
- I have heard that enabling Windows 7 Compatibility Mode for GTR2.exe may help on Windows 11
- GTR 2 PC Maxed Out 720p Windows 11 intel UHD i3-1115G4 Laptop [Video] - Shows that (1) Windows 11 is possible and (2) even weaker onboard graphics chipsets can run GTR2
If you're really stuck:
- If the suggestions below don't help try reviewing this GTR2 and Windows 11 thread for more comments from other people including generic tips for 'how to run older software on newer windows'.
- There's some registry changes for GTR2.exe that may help.
- The DXVK Integration > Troubleshooting section may also help in the Crew Chief GTR2 Enhancements Plugin manual.
GTR2 and Multiple GPUs
- GTR2 and Multiple GPUs - Symptoms: Starting GTR2 repeatedly opens GTR2Config.exe, GTR2 won't start
- Eg. Laptops with Onboard + Dedicated
- Alternative: It is possible the NVIDIA Control Panel can be used to force GTR2 to use the dedicated GPU although I've never done it this way, I've just heard maybe this is an alternative. [2]
GTR2Config.exe Video Driver Selection
- Ensure the Video Driver dropdown in GTR2Config.exe is set to your dedicated GPU not your onboard GPU (ie. not an Intel HD/UHD Graphics adapter)
- See below for a fix when the dedicated GPU is not being shown in GTR2Config.exe which prevents the user from selecting it

Fix for Dedicated GPU not available to set in GTR2Config.exe
- tl;dr Set the preferred GPU for GTR2.exe and GTR2Config.exe to the dedicated GPU in the Windows Display settings: This enables GTR2Config.exe to show the dedicated GPU and you can now select it
- Original Link - User describes how they solved being able to select their dedicated NVIDIA GPU instead of their integrated AMD GPU in GTR2.exe
- Another solution: "open in windows Settings > System > Display > Graphics , add GTR2.EXE and GTR2Config.exe, select you GPU preference" [3]
Steps:
- Settings > System > Display > Graphics
- Add executables: GTR2.exe and GTR2Config.exe
- For each EXE added, set the preferred GPU to the dedicated GPU
- Open GTR2Config.exe and select the dedicated GPU from the Video Driver drop-down, save and exit
- Launch GTR2: It should now run with the dedicated GPU
StarForce Disc Protection DRM
The following applies for Disc versions:
- StarForce Disc Protection DRM was used at least for the Disc version of GT Legends but it is no longer compatible with Windows 7/8/10+ (see comments here)
- StarForce DRM is considered malware by average users and should be avoided
- Old StarForce DRM is officially considered malware on Windows 10/11 and installation is blocked at the OS level although newer StarForce DRMs do not appear to be blocked [4]
- Never install Official SimBin 1.1 because it will install StarForce DRM: Use No-CD and EXEs from GTR2 and GTL HQ Anniversary Patches [5]
- Never run EXEs from Disc or Demo downloads (installing from version 1.0 discs is okay though)
- You can still use the Disc version after GTR2 HQ Anniversary Patch is installed (May also apply to GTL/GT Legends)
Resources
GTR Engineers Handbook - The official GTR Setup Guide
- GTR Engineers Handbook (Online) – The official GTR Setup Guide (PDF Download; Backup PDF; Backup HTML)
- “The official GTR Engineer’s Handbook, which is hard to find on the internet (and not included with the game). It was made for the first GTR game title by Simbin in 2004, but it also applies to the sequel.”
- “Combined with the GTR2 Car-Owner’s Manual, it’s a must have for those who use GTR2’s original cars. A great source of knowledge for GTR2 users, as it provides important information as a setup guide.” [6]
Note: The GTR Engineer's Handbook is for the first GTR game, not GTR2, but still contains valuable and relevant information for GTR2.
GTR2 Car-Owner’s Manual
- GTR2 Car-Owner’s Manual – Extensive details on the car specs, tire character, power graphs, etc (PDF Download; Backup)
- “Along with the GTR Engineers Handbook, this manual is a must have for those who use GTR2’s original cars. It has all extensive data on every single car specs, such as tire characteristics, ideal temps and pressures, power graphs, transmission, aerodynamics, weight balance, etc, etc.”
Car Setup Guide for GTR2 - Setup Your Car in 21 Steps by LmS

VonDutch Original Better AI Tutorial
- Original Link
- Archive Link - Original VonDutch NoGripRacing post
- Comment with interesting details - Beware: Interesting but accuracy is questionable
[i]This tutorial is not mine, I managed to DL it from NG before it's gone...
Some I have tried, some others not. Quoted unedited.
-Babis-[/i]

---------------------------
[b]VonDutch's Better AI tutorial[/b]
---------------------------

Okay I've just recently been active here and have seen a lot of threads with questions about AI behavior, performance, etc. I thought that I would try to sum up what I have learned in order to help some of you all out.


[b]AI Slowdown[/b]
---------------

First thing to cover is the dreaded "ai slowdown" This always frustrated me cause you can spend time setting up for a race getting everything perfect and then all the ai cars are going at about 2/3's pace.
This usually happens when you have a race of 1 hour or longer. So how do we fix this??? Well its not so much a fix but a band aid, BUT it will let you race the AI as long as you want without them slowing down(except for tire wear etc.)

First if you are going to modify files ALWAYS make a backup first. I change the extension of a file from .gdb to .back, you can simply add it to the file like this. "barcelona.gdb.back". Leave it in the same folder and you won't lose it if you want to make a change.

The "ai slowdown" problem is actually an aero damage issue. The ai bump and grind with each other (especially if you have raised the aggression level) and damage each other to the point where they slow down significantly over the course of a race. This usually happens around 45 minutes to 1 hour into the race. So how do we fix this??? First you need to go to the .dmg(damage) file of each and every team that you want to race against.(hey I did'nt say it would be easy! lol.)
Look for this line "AeroMin=1100.0" Raise this to 7500.0 or higher. What this does is raise the minimum amount of force that it takes for the ai (or your car for that matter) to become damaged. This number takes some trial and error to get right, but 7500 is a good start. Remember that the number can be different for the different vehicles in the game/race. You can also edit other parameters in the .dmg file such as the amount of force required to detach the wing spoiler etc. Again its trial and error, but ISI/Simbin was nice enough to include explanations of most lines in these files. So play around with the settings until you find something that works for you!


[b]AI Stability and Handling[/b]
-------------------------

Another thing that bothered me was how the AI would hardly budge if you gave them a bump yet when they bumped you it would send you flying off the track. Well there is a cure. Go to the .hdc file in your "teams" directory and edit this line; "AITorqueStab=(1.25, 1.25, 1.25)"
Change this to "AITorqueStab=(1.00, 1.00, 1.00)". What this does is make the ai less stable and more like you. This number will vary from car to car but again 1.00 is a good start.

Next find these lines in your .hdc:

AIEvenSuspension=0.0 // averages out spring and damper rates to improve stability (0.0 - 1.0)
AISpringRate=1.0 // spring rate adjustment for AI physics (improves stability)
AIDamperSlow=1.2 // contribution of average slow damper into simple AI damper
AIDamperFast=0.4


DONOT make big changes here or the AI wont be able to comple a lap!!! What's working for me now is this

AIEvenSuspension=0.1 // averages out spring and damper rates to improve stability (0.0 - 1.0)
AISpringRate=1.0 // spring rate adjustment for AI physics (improves stability)
AIDamperSlow=1.1 // contribution of average slow damper into simple AI damper
AIDamperFast=0.3

Again this is all trial and error and different cars will respond differently to the change. Some will require more some less. What this does is make the ai much more human like. They will slide around and be less "perfect".


[b]Engine Failure[/b]
----------------

If you want more engine failures/retirements in your race then goto the .eng file in your "teams" directory and change these lines:

LifetimeAvg=10800
LifetimeVar=2250

The lower you make Lifetime average the more engine failures will occur(yourself included) So try lowering this number gradually.
"LifetimeVar" is the amount of variability or "chance" that engine failure will occur. Raise this and you will see more failures. Lower and you should see less.


[b]Setups[/b]
---------

Setups do make a difference to the ai. If you spend the time finding a good setup for each vehicle that will be in your race it will be much more competitive and much more challenging for you. You can also have a qualify and race setup for the AI. Again in your "teams" folder place your setups for each track and name them like this;

Oschersleben.qual.svm
Oschersleben.race.svm

Again do this for each of the different types of cars that will be in your race or season. You'll need to do this for each track that you are racing at. If you have any doubt refer to the .gdb of the track and look at the topline this is the name of the track that you will use in the .svm file.


[b]Player file[/b]
------------

Ok hopefully you are still with me (yes I know this seems like a lot of work but trust me a few hours spent doing this will result in a much better ai experience for you). Now lets go to your .plr(player file).
You can find it here GTR2\UserData\your player name.

Open it and find "[ Game Options ]"
Scroll down and find these lines:

AI Driver Strength="100"
AI Power Calibration="7" // Adjustments with AI strength (0=none, or add the following: 1=power, 2=gearing, 4=fuel)
AI Additional Fuel Mult="1.00000" // Additional fuel multiplier for AIs because of their driving style
AI Brake Power Usage="1.13900" // Fraction of theoretical brake power that AI attempt to use
AI Brake Grip Usage="0.97800" // Fraction of theoretical brake grip that AI attempt to use
AI Corner Grip Usage="0.94900" // Fraction of theoretical cornering grip that AI attempt to use
AI Max Load="38875.00000" // Maximum total load to set up theoretical performance tables
AI Min Radius="20.00000" // Minimum radius turn to set up theoretical performance tables
AI to AI Collision Rate="40" // Detection rate per second (1-40) for AI-to-AI collisions
Player Car Equal="1"

"AI Driver Strength" Self explanatory
"AI Power Calibration" Ihave experimented with this number and never really seen a difference so I use "7"
"AI Additional Fuel Mult" You can raise or lower this number higher = more fuel used by the ai lower = less
"AI Brake Power Usage" Raising this number above 1.00 helps to get rid of the "special brakes" the ai seem to have. They brake much more like with this number raised above 1.00. I have gone as high as 1.500

"AI Brake Grip Usage" If you want the ai to use less brake lower it, more brake raise it. I have never gone above 1.00 though.

"AI Corner Grip Usage" Raise this number if you want the ai to corner harder lower it if you want them to use less of their max.

"AI Max Load" Lowering this from the default which I think is 40000.00000 will result in a much more aggresive ai. They will try to pass more and pass each other more.

"AI Min Radius" Leave this alone

"Ai to AI Collision Rate" I like this at 40 cause it hopefully lets the ai crash less. If you set this to low the ai will drive right through each other. So set it at 40.

"Player Car Equal" Setting this at 1 results in closer racing both in qualifying and the race. If you set it at 0 you will have more variability in laptimes of the ai


[b]Track file[/b]
------------

Lastly go to the .aiw file in each of the tracks that you want in your race. Find these lines:

WorstAdjust=(0.7500) // Used for 70% AI strength option
MidAdjust=(1.0200) // Used for 100% AI strength option (note that AIs now use full throttle above 95% AI strength option)
BestAdjust=(1.1900) // Used for 120% AI strength option
QualRatio=(1.0069) // Used to adjust AI speed in qual compared to base values
RaceRatio=(1.0110) // Used to adjust AI speed in race compared to base values

If you want to speed up the AI, raise the "adjust" lines. If you want the ai to qualify faster lower the QualRatio line. You can lower it below 1.00 btw. If you want to make the ai faster in a race lower RaceRatio.

-----------------------------------------------------------
http://www.nogripracing.com/forum/showthread.php?t=39455
Download Sites For Mods
- OverTake (Formerly Race Department) - Hosted downloads
- eSport-Racing.de (2025 Archive)- Hosted downloads
- Festbierbude (2025 Archive) - GTR2 Power & Glory mods specifically. Click British flag at the top for English.
- Koelschbierbude (2025 Archive) - Click British flag at the top for English.
- Classic Motorsport Hub GTR2 Repo (2024 Cloud Drive Archive). Files: GTR2, BMW M3 Challenge.
- ftp://87.229.14.12/hsw [defunct] (2021 Cloud Drive Archive). Files: GTR1, GTR2, GTL, Race 07/GTR Evo/Race On/STCC.
- http://tt.servegame.com:100 [defunct] aka http://trippteam.servegame.com:100/ [defunct] - (2019 Cloud Drive Archive). Files: GTR2, GTL.
- Lolo San GTR2 Tracks Collection Torrent (2025 Cloud Drive Archive). Contents ~2013. Files: GTR2. [7]
- MediaFire Trend Search) - A search engine for MediaFire links found on the internet. Many GTR2 links in search results.
Other:
- Community forums - Modders often showcase and link their mods on forums, and you can request mods you're unable to find or access
- Internet Archive - Some GTR2 files and mods have been uploaded to Archive.org
Notes:
- Independent sites like Esport-racing, Festbierbude, Koelschbierbude are invaluable sites to the community and I highly recommend donating to them to keep them going
- Archives are maintained by Simwiki. Consider donating: Help Support Simwiki
List of 797 extra tracks available for GTR2 by Simbin from A to Z
The Ultimate Guide - How to manually fix everything by hand, restore removed content, and some other things
- The Ultimate Guide [Article] (Backup)
- "How to fix everything, restore removed content and some other things."
- This is a very low-level, hands on approach to the fixes and improvements we generally recommend doing easier ways and have documented here on Simwiki
- You probably don't want to do these fixes by hand but it's linked here mainly for posterity
Vanilla GTR2
Competent But Old School
- Vanilla GTR2 is GTR2 as is, just install and run the game without doing anything that can't be done by the game itself, such as optimizing, tuning, or tweaking features outside the game, or installing any add-ons the game doesn't allow you to install in-game.
- So, for example, you wouldn't clean up the graphics with a custom NVIDIA profile, or improve FFB by editing the PLR, or fix the greyed out Porsches and Ferraris in the Steam version, or add high resolution texture packs, etc.
- I suspect most people saying "Vanilla GTR2" have tweaked at least a few things the game can't do by itself. So, to be clear, it may be preferable to say a "true vanilla" GTR2 if you've really tweaked nothing outside the game.
- Vanilla GTR2 as is is a competent but old school experience. That's why I have what I call #Minimum GTR2 and rarely spend time in a true vanilla GTR2 install.
Vanilla GTR2 Demonstrations:
- True Vanilla Steam GTR2 In 2024 Featuring Gray Ferraris and Porsches! [Video] - Shovas (2024)
- Windows XP Gameplay: GTR 2 FIA GT Racing Game [Video] - Windows XP Gameplay (2025)
Minimum GTR2
You can think of Minimum GTR2 as my setup specification for a minimum acceptable GTR2 experience. -Shovas
You don't have to do this right away. You can try vanilla GTR2 and come back to this later. Just know that even a Minimum GTR2 setup will be much more pleasing and enjoyable than a true vanilla GTR2 experience.
Note: This assumes you are starting from a Vanilla GTR2 drop.
Optimize CPU Core Usage
- tl;dr Force GTR2 to use multiple cores by the Windows Task Manager, CMD script, Process Lasso, Bill's Process Manager, etc.
- GTR2 benefits immensely by forcing it to use multiple cores. This can double your framerate or more.
- By default, GTR2 is largely single-core bound by default. You will struggle to get 60fps consistently on any hardware without this multi-core tweak.
- CMD Script:
- Note: The preferred solution is Crew Chief GTR2 Enhancements Plugin with changeProcessAffinity tweak, Process Lasso, or Bill's Process Manager. Otherwise, do it by hand with the Windows Task Manager or this CMD script.
- Create a start-gtr2.cmd file in the GTR2 root folder
- Edit the file and place the following in it:
start "" 0x0 "GTR2.EXE" ""- The first argument is the window title. It can be blank or anything you like. Some software may look for a particular window title so you might want to leave it blank here.
- The second argument is the CPU affinity hex mask. Find your CPU's mask by using an online CPU affinity mask calculator. See GTR2 and Core and Thread Configuration for my example.
- The third argument is the EXE. It can be a full path or a relative path.
- The fourth argument is the arguments to the EXE. For GTR2, you might want to include -trace=1000" to #Enable Debug Tracing
NVIDIA Profile Settings
tl;dr
- GTR2Config.exe:
- Windowed Mode
- Fullscreen Anti-Aliasing: Disabled
- NVIDIA Profile Inspector:
- Antialiasing compatibility: 0x004412C1 (Diablo III)
- Antialiasing – Mode: Override (Use Enhance if Fullscreen Anti-aliasing is enabled in GTR2Config.exe)
- Antialiasing – Setting: 8xS [Combined: 1×2 SS + 4x MS]
- Antialiasing – Transparency Supersampling: 8x Sparse Grid Supersampling
- Anisotropic filtering mode: User-defined / Off
- Anisotropic filtering setting: 16x
- Texture filtering – Negative LOD bias: Clamp(*)
- Texture filtering – Quality: High quality(*)
Notes:
- 0x004412C1 (Diablo III) Antialiasing Compatibility:
- Required to make Override AA work when Fullscreen Anti-Aliasing is Disabled in GTR2Config.exe
- 0x00000000 (Default) is sufficient when Fullscreen Anti-Aliasing is enabled in GTR2Config.exe
- Notes: GTR2 Antialiasing and Diablo III AA Mode
- AA Override vs Enhance:
- AA Mode Override always works
- AA Mode Enhance only works when AA is at least enabled in GTR2Config.exe
- AA Mode does not seem to be related to Fullscreen vs Windowed mode
Considerations
- I run in Windowed mode, not Fullscreen mode, that may matter I’m not sure.
- The Crew Chief GTR2 Enhancements Plugin enables perfect Borderless Windowed mode. Highly recommended.
- When using Windowed Mode, ensure GTR2's Video Options (GTR2Config.exe) has Full-Screen Antialiasing -> Disabled (Unchecked)
NVIDIA Control Panel
- 3D Settings > Manage 3D Setting > Global Settings:
- Power management mode: Prefer maximum performance
NVIDIA Profile Inspector
Download NVIDIA Inspector, virus scan at virustotal.com, and install.
Run nvidiaInspector.exe, click the Start Profile Inspector button (right-middle), find GTR 2 in the Profiles drop-down, and then set and apply these settings:
- Reset to NVIDIA Profile Defaults
- Compatibility
- Antialiasing compatibility: 0x004412C1 (Diablo III)
- See notes above about when this is required vs not required.
- Antialiasing compatibility: 0x004412C1 (Diablo III)
- Sync and Refresh
- Maximum pre-rendered frames: 1
- Antialiasing
- Antialiasing – Mode: Override any application setting - if Fullscreen Anti-Aliasing disabled in GTR2Config.exe, otherwise use Enhance
- Disable in-game Antialiasing using GTR2Config.exe
- Antialiasing – Setting: 8xS [Combined: 1×2 SS + 4x MS]
- Antialiasing – Transparency Supersampling: 8x Sparse Grid Supersampling
- Antialiasing – Mode: Override any application setting - if Fullscreen Anti-Aliasing disabled in GTR2Config.exe, otherwise use Enhance
- Texture Filtering
- Anisotropic filtering mode: User-defined / Off
- Anisotropic filtering setting: 16x
- Texture filtering – Negative LOD bias: Clamp(*)
- Texture filtering – Quality: High quality(*)
- Common
- Ambient Occlusion setting: High quality(*)
- Ambient Occlusion usage: Enabled(*)
(*)I couldn’t quickly visually confirm these were actually doing what they should be doing but left them enabled anyway
Caution: Antialiasing can decrease performance. Reduce the setting if it slows down GTR2 too much for you.
Restore Missing Original Content
Some original content has been removed since release, such as Porsches and Ferraris.
Note: You already have the fix if you’re using the CrewChief GTR2 Enhancements Plugin (comes with CrewChief).
Otherwise, follow the steps here. Alternatively, here’s a more fleshed out guide. If you're a wizard and want to hex edit: Reinstating GTR2 Ferrari and Porsche Cars By Hex Editing.
tl;dr
- Ensure you’re running version 1.1
- Steam GTR2 already is 1.1
- Disc GTR2 is probably 1.0 so install EU 1.1 Patch or US 1.1 Patch
- Install No CD patch
- This is what brings back missing original content
- Note: Skip the No CD Patch if you plan to use Crew Chief as it requires the original Steam GTR2.exe. Crew Chief already fixes missing original content.
- Reapply 4GB Patch if you had it before as these steps will lose the change
Gotchas:
- Skip the No CD Patch if you plan to use Crew Chief as it requires the original Steam GTR2.exe. Crew Chief already fixes missing original content.
4GB Patch
You can allow GTR2 to use up to 4GB of memory (it was developed with a 2GB limit). You may find this necessary as you add more and more mods with new assets that take up more and more memory. So you might as well just do it now.
Simply download the 4GB Patch tool, run it, find your GTR2.exe file, and press OK. You’re done!
The 4GB patch appears to have successfully applied on the GTR2 NO CD patch GTR2.exe file I discussed above under the “Fixing Missing Original Content” heading.
Note: If you happen to overwrite your GTR2.exe file then you will need to run this again. For example, if you rerun the US/EU or NoCD patches mentioned earlier.
Skip Intro Videos
These are always annoying, here’s how to stop them (from PC Gaming Wiki.com GTR2 article):
- Open Windows Explorer and find your Steam Library folder for the game: steamapps\common\GTR 2 – FIA GT Racing Game\MovieFiles
- Rename (or delete) these files: Intro.bik, GameIntro.bik, SimBin.bik
User PLR Profile Tweaks (Draw Distance, Cockpit Enhancements, etc.)
Edit UserData\User\User.PLR to make these changes.
Increase Rearview Draw Distance
Set Rearview Back Clip="5000.00000" and adjust as desired ("Back plane distance for mirror (0.0 = use default for scene)")
Enable Wheels Visible In Cockpit For Open-wheelers
Set Wheels Visible In Cockpit="1"
Defviews.cam Tweaks (Draw Distance, Level of Detail, Cockpit Geometry Clipping, etc.)
Increase Draw Distance
You can increase the Draw Distance by editing UserData\defviews.cam and changing the second parameter of ClipPlanes to a larger value. I use 100000.000000. For comparison, the original values vary from 500 to 2500, and HQ Anniversary Patch uses 33000.
Caution: On old hardware, this may lower FPS, but on any kind of modern hardware I don’t think you’ll notice.
Increase Level of Detail
Increasing LODMultiplier can increase the Level of Detail. In my experience, the original LODMultiplier values (1.0) causes visually noticeable and jarring loading in of high or low detail car models depending on how far away they are from you.
For an install without CCGEP, I use a value of 8.00000.
For an install with CCGEP, I set this to 0.0 and use graphicsForceTrackLODOut=2500 (start here and adjust).
Caution: On old hardware, this may lower FPS, but on any kind of modern hardware I don’t think you’ll notice.
Reduce Cockpit Objects Clipping and Breaking 3D Objects
- Reduce the first value of the ClipPlanes=(0.17500, 500.00) setting in the Cockpit section:
- Recommended value: 0.04375
- Other working values: 0.17500 (default), 0.0875
- The values are in meters. So, 0.05 = 5cm
- The first value indicates how close to the camera geometry will be clipped out (not displayed). I'm not sure why it's not just zero. Some playing around is required, I guess.
- The near clipping plane distance is the up close distance at which objects disappear from view. In real life, objects don't disappear, they just fill up your whole vision. You don't want that either so you set something but just enough to get rid of the appearance of 'broken' object models.
- Broken object models might look like roll cage tubing ending when the model should extend behind your head. Roll cage head padding objects also do this. Your arms can even get clipped if you turn far enough to the left or right depending on your ClipPlanes settings.
High Resolution Mirrors
- SHO HD Mirrors - The best mirrors in sim racing, if I do say so, myself
- High Resolution Mirrors by Speed1
Mirrors are low resolution, by default, in GTR2 with no way to fix in-game. No worries, just download one of the mirror mods and drop MIRROR.BMP in your GameData\Teams folder. That’s it.
You can also extract MIRROR.BMP from the HQ Anniversary Patch by GTR233. It’s a bit more work but they might be newer, and there’s a 1K and 2K version, but honestly I can’t see much of a difference.
Gotchas:
- Some mod cars have a MIRROR.BMP in their Team folder that overrides the GameData\Team\MIRROR.BMP and it will probably looks worse than the high quality mirror mods. Just delete their MIRROR.BMP or rename it out of the way.
Fix Slow AI at Hockenheim
At least on Steam GTR2, AI at Hockenheim always drive very slowly around the track no matter what. The bug seems to be they never turn off their pit limiter. Here’s how you can fix it.
Notes:
- Options 3 + 4 are recommended at this time to fix both slow AI and lap counting bugs.
- I plan to include a simple and complete all-in-one solution one of these days
- Slow AI bug is about xpitout GMT
- Lap counting bug is about xsector GMTs
Option 1 - Menrva's Fixes for GTR2 Tracks (Lap Counting Fix):
Option 2 - Extract HQ Anniversary Patch Fix (Slow AI Fix - Still Bugged):
- Download the 3-part HQ Anniversary Patch
- Copy the TRK files from the “basetracks-HQ-ON” folder to your GTR2 GameData\Locations\Hockenheim folder
- Copy the HQHockenheim.gtr from the HQHockenheim folder to the same GTR2 folder
There may be unknown side-effects since it is using HQ Anniversary Patch files but since the track is unplayable on stock Steam GTR2 you might as well just try it.
Note 2023-07-29: Hockenheim Short appears to be bugged so far in that laps aren’t being tracked. Hockenheim GP 2004 and National seem to work. I’ve let GTR233 know in the Race Department HQ Anniversary Patch thread. Menrva says he has fixed this in his version.
Option 3 - Fix TRK with correct xsector references from the xsector GMTs in the GTR (Lap Counting Fix):
- tl;dr Extract xsector GMTs from the Hockenheim HQ Anni Patch GTR archive and rename the xsector file name references in the TRK to match
- Solution by Chris S. on Simwiki Discord and based on Menrva's notes for fixing Hockenheim
- "- Fixed bug with Steam's version of Hockenheim Short not tracking laps; it requires to rename the xsectorX.gmt instances in the SHHockenheim.trk file." [8]
- This solution should fix slow AI and ensure laps are tracked
For Hockenheim Short just put the 2 xsector#sh.gmt's in the Hockenheim folder, open up the SHHockenheim.trk file with a text editor, type xsector in the find box you'll see
Instance=xsector1
{
  Render=False Change=False
  MeshFile=xsector1.gmt CollTarget=True HATTarget=False
  Response=VEHICLE,TIMING
}
Instance=xsector2
{
  Render=False Change=False
  MeshFile=xsector2.gmt CollTarget=True HATTarget=False
  Response=VEHICLE,TIMING
change to Instance=xsector1
{
  Render=False Change=False
  MeshFile=xsector1sh.gmt CollTarget=True HATTarget=False
  Response=VEHICLE,TIMING
}
Instance=xsector2
{
  Render=False Change=False
  MeshFile=xsector2sh.gmt CollTarget=True HATTarget=False
  Response=VEHICLE,TIMING
thats it

-Chris S.

Just take the reworked  xsector1sh.gmt from the HQ track or the download and plop it in the default track folder and edit the trk file.

-Chris S.
Fragtastic helpfully documented his full steps to fix the laps-not-counting bug on the GTR2 Steam Discussions forum [9]:
Cool. Mind you, I didn't download the Anniversary Patch. Mine's strictly the Steam version with the hex-edited .exe file so that Ferrari and Porsche cars are unlocked.

Also, just to elaborate fully, this is what I did as per instructions in the Readme file.

1) Copy both XSECTOR1SH.GMT and XSECTOR2SH.GMT from the downloads and paste them inside "GTR 2 - FIA GT Racing Game\GameData\Locations\Hockenheim"

2) Right click on SHHockenheim.trk file and open it with Notepad++

3) Ctrl+F to find XSECTOR as keyword.

4) Copy-paste the following script
Instance=xsector1
{
Render=False Change=False
MeshFile=xsector1sh.gmt CollTarget=True HATTarget=False
Response=VEHICLE,TIMING
}
Instance=xsector2
{
Render=False Change=False
MeshFile=xsector2sh.gmt CollTarget=True HATTarget=False
Response=VEHICLE,TIMING
}

For me, the above script should be strictly in between the following without the additional lines...

Instance=xfinish
{
Render=False Change=False
MeshFile=xfinish.gmt CollTarget=True HATTarget=False
Response=VEHICLE,TIMING
}

**Copy-Paste the new script here**

Instance=xpitin
{
Render=False Change=False
MeshFile=xpitin.gmt CollTarget=True HATTarget=False
Response=VEHICLE,PITSTOP
}

Hope that helps.

-Fragtastic
Option 4 - Use HQ Anni Patch xpitout.gmt (Slow AI Fix)
- Opened the gtr file for HQ hockenheim, extract the xpitout.gmt, and rename it to xpitouthq.GMT
- copy over to base game haockenheim folder
- modify hockenheim.trk for the GP and national layouts: Look for xpitout.gmt in the text and change it to xpitouthq.gmt

-Angel A.
Notes:
- I'd prefer just packing in the HQ xpitout.gmt into the GTR to avoid any other steps -Shovas
Sun Positions and Lighting
This fixes a number of issues with original tracks having incorrect sun positions resulting in inaccurate lighting and shadows.
Force Feedback Settings
The SHO Competition FFB mod crowdsources wheel-specific FFB parameters and provides PLR files for popular wheels.
This is a little bit obvious, we all go pretty quickly for setting up force feedback, but I felt the need to emphasize this because the default force feedback options are, I feel, not enough to bring GTR2’s force feedback closer to modern standards.
You will most likely have to edit your UserData PLR file to get the right feel of your force feedback.
The HQ Anniversary Patch provides new UI menus that give you access to more FFB tuning parameters than the default screens provided. They don’t provide access to the most important FFB tuning parameters, unfortunately. The only other method is to edit the GTR2 UserData\User\User.PLR file.
So, for those reasons, see the SHO Competition FFB mod linked above.
Modern FFB Options:
- Consider CCGEP FFB Options. CCGEP Steering Force FFB is the newest and most advanced FFB implementation available for GTR2.
Modern GTR2
You can think of Modern GTR2 as my setup specification for a baseline modern GTR2 experience. -Shovas
GTR2 holds up remarkably well in the features department but shows its age in the level of quality we now expect of those features. Some things can be improved like textures, visual effects, sounds, even AI and new and improved cars and tracks, themselves.
Note: This assumes you are starting from a Minimum GTR2 drop.
Modern GTR2 Simple Patch
Work In Progress - Experimental Proof of Concept
- Modern GTR2 Patch - Simple one-step patch to take any vanilla GTR2 to Modern GTR2
Original Tracks Updates
- Invisible Collision Barriers Fixes
- Zhuhai HQ Textures - Nice, much higher quality than original
I was recommending DirectX 9 Converted Original Tracks Updates for a while but it has some conflicts with other mods and seems to go deeper and affect more things than I prefer so it's worth a look but I think I'll take it out of rotation for now.
Enhanced Head Physics
- rFactor 2 headphysics for GTR2
- Improves the way the head camera moves in the cockpit which can help increase immersion
- Recommended UserData\User\User.PLR values:
- Head Physics="0.80000" // Fraction of head physics movement applied to cockpit view (position AND rotation)
- Head Rotation="1.00000" // Additional head physics multiplier affecting rotation only
- World Movement="0.02000" // Fraction of world movement seen through driving views
HD Gloves and Suits
High Quality Skies
Notes:
- Sometimes high definition skies can clash with the old school lo-fi look of GTR2
- But over the years, I've settled on high quality skies over original skies
- More recently, I've started using HD Skies Reworked over 8K Beautiful Skies
- 8K Beautiful Skies is really impressive but (1) has a certain distracting colour tone, (2) has distracting 'stitching' or other visual artifacting, (3) has funny but unrealistic and distracting things like the ISS space station which is fun but not something I want in my sim skies
- So, for me, HD Skies Reworked stays closer to the spirit of the original skies
Improved Car Sounds
Options:
- Mildrew Sounds - Ferrari 550/575, Lister Storm, Chrysler Viper GTS-R, Corvette C5R
- Alternative Effect Sounds by SiGi - New sounds for many or all cars, some sounds are on the edge of listening tolerance (eg. BMW M3 GTR)
- Ferrari 575 GTC Sound Mod by Need_For_Speed - Decent but conflicted with Mildrew that came with more car sounds
- BMW M3 GTR Sound Mod by cyxapik - This was recently updated and quite improved. Previously, it was just on the edge of listening tolerance.
Notes:
- Car sounds are tricky, they need to be accurate but not so accurate they are intolerable without earplugs or a helmet to muffle the sound, as you would have in real life.
- I try to look for car sound mods that use a real-life onboard as reference.
Crew Chief and the GTR2 Enhancements Plugin Fixes and Improvements
Crew Chief and its GTR2 Enhancements Plugin provides great improvements, fixes, and new features like graphics flicker fixes, various crash fixes, borderless windowed mode, automatic use-all-cores, changeable weather fix, VR support, gearbox enhancements, high refresh rate physics and ffb, DXVK, ReShade, RealFeel FFB, Wiper Patches, Real Weather, and many more fixes and improvements, and even more coming from the sounds of it.
I consider the Crew Chief GTR2 Enhancements Plugin to be a critical part of a Modern GTR2 experience.
- Crew Chief GTR2 Enhancements Plugin Homepage - Latest details and downloads. It comes with Crew Chief so just install Crew Chief.
- Modernizing GTR2 with the Crew Chief GTR2 Enhancements Plugin - Additional Simwiki page with help for installation steps and extra features including DXVK, ReShade, RealFeel FFB, Wiper Patches, Real Weather, and more.
Custom HUD Overlays
- SHO XD Style SimHub Overlays (requires Steam GTR2.exe)
- XD Telemetry Overlays (requires Disc GTR2.exe or HQ Anniversary Patch fixed GTR2.exe)
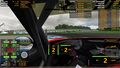
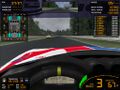
Both SHO XD Style SimHub Overlays and the original XD Telemetry Overlays provide additional helpful HUD overlays that include things like Tyre Wear/Temps/Pressures, Leaderboard, and more.
Click here to download SHO XD Style SimHub Overlays (requires Steam GTR2.exe)
Click here to download XD Telemetry Overlays (requires Disc GTR2.exe or HQ Anniversary Patch fixed GTR2.exe)
Here’s some screenshots to illustrate (click to view full size):
-
 SHO XD Style SimHub Overlays
 -
 XD Telemetry Overlays


And here’s a video to demonstrate SHO XD Style Telemetry Overlays:
Until recently, XD Telemetry Overlays was the de facto way to get tire wear/temps/pressures and a leaderboard. It’s great and still provides exactly what you need but it also hasn’t been updated in a while, only provides a few overlays, and doesn’t work with the Steam GTR2.exe (not a problem if you use HQ Anniversary Patch which installs a compatible GTR2.exe).
The modern and up-to-date way to get add-on or custom overlays in sims is with SimHub. The SHO XD Style SimHub Overlays mod provides a collection of overlays reproducing the XD overlays, in the XD style, replacing original GTR2 HUD overlays, and adding new overlays.
Here’s a list of overlays included in SHO XD Style SimHub Overlays (as of June 2022):
- Awareness Left/Right/Rear
- Dash/Mini Dash/Mini Dash V(ertical)
- Delta Bar
- Lap Info
- Leaderboard
- Live Track Map
- Pedals
- Position Info
- Radar
- Relative Leaderboard
- Splits/RSplits Info
- Shift Light
- Status Info
- Tyres Temps/Pressures/Wear + Brake Temps + Oil/Water Temps
Repositioning Original XD Standings Box
Here’s an XD overlay tweak to the XD.INI file that repositions the Standings Box to top-left, to the right of the native Position dialog. This prevents the Standings Box from getting in the way of the rearview mirror. Here’s the tweak: StandingsPosX=370 and StandingsPosY=0. To reduce the number of entries in the Standings Box, so it takes up less space, set StandingsPlayersVisible=7. I find this improves the layout and frees up the screen for where you really want to look while you’re racing.
Repositioning Original XD Tire Temps (Motec) Box
I found the default (automatic) position of the XD Tire Temps (Motec) box covered the flags (on 1920×1080) that show up from time to time so here’s a list of alternative positions for 1920×1080 resolution using the HQ Anniverary Patch Power & Glory 3 (PNG3) HUD – Use these as examples for how to move them when using different HUDs.
- PNG3 HUD: Top-left (covers flags), Scale=100, MotecPosX=auto (20?), MotecPosY=auto (50?)
- PNG3 HUD: Bottom-right, Scale=100, MotecPosX=1670, MotecPosY=725
- PNG3 HUD: Bottom-right, Scale=90, MotecPosX=1690, MotecPosY=700
- PNG3 HUD: Bottom-right, Scale=80, MotecPosX=1720, MotecPosY=775
- PNG3 HUD: Center-left, Scale=80, MotecPosX=550, MotecPosY=870
- PNG3 HUD: Bottom-left, Scale=100, MotecPosX=20, MotecPosY=670
- PNG3 HUD: Bottom-left, Scale=90, MotecPosX=20, MotecPosY=695
- PNG3 HUD: Bottom-left, Scale=80, MotecPosX=20, MotecPosY=720
HQ Anniversary Patch
- HQ Anniversary Patch
- There are 2 parts to download (as of June 2022)
- Requires latest 7zip to extract. You need to open the first archive in 7-zip and extract: 7-zip is smart enough to extract all parts at once.
- HQ Anniversary Patch is a one-stop, drop-in alternative to #Modern GTR2
- Personally, I create dedicated GTR2 drops so that I have Vanilla GTR2, Minimum GTR2, Modern GTR2, and HQ Anniversary Patch GTR2 installations that I can run separately whenever I wish
- Go ahead and get it. Don’t even think twice. It’s that’s good.
Description:
This GTR2 HQ Anniversary PATCH represents 6 years of work (nearly 20 000 FILES!) and includes all the necessary MODS/PATCHES for GTR2 plus tons of HQ textures. There are 2 games in 1, first the default 2003-2004 game with stock cars and tracks which get only few textures updates, second the HQ Cars&Tracks (with “HQ” prefix in menu) which get ALL the fixes/patches, more HQ textures plus exclusive graphics (both 2D/3D) : indeed, my will is to keep original game untouched to avoid online mismatch on internet and to see all the work done so far in this HQ Anniversary Patch when you compare both.
In-game
Game Settings
Field of View (FOV)
GTR2’s default FOV (field of view) shows you a large amount of your cockpit but it’s not realistic and can be a disadvantage in terms of judging speed, distance, and general timing. You will almost certainly be faster with correct FOV because you’ll be better able to judge speed, distance and timing.
Need convincing? Try watching this classic Empty Box video on why you would adjust your field of view.
If you use HQ Anniversary Patch your FOVs will be updated for you, and you probably won’t need to change anything, but otherwise you can do so manually in the GTR2\UserData\defviews.cam file as described here.
If you find you need to, tweak the field of view somewhat wider than default.
As a good rule of thumb, you want your field of view to include your driver-side mirror and about half of your rear-view mirror.
For those with head tracking, such as TrackIR, Tobii, or VR, bring your FOV so that you can see half of your driver-side mirror and half of your rear-view mirror, since you can move your head around to see the mirrors in full.
Field of View (FOV) Reference Table
A list of various FOVs and what they look like so you don't have to try them all yourself.
- 75.0: Arcade Helmet Camera
- 60.0: Sim Helmet camera (Side/Rear Mirrors fully visible)
- 50.0: Sim Helmet camera (Side/Rear Mirrors 2/3rd visible)
- 47.5: Sim Helmet Camera (Side/Rear Mirrors half visible)
- 45.0: Sim Helmet Camera (Side/Rear Mirrors third visible)
- 42.5: Sim Helmet Camera (Side/Rear Mirrors quarter visible)
- 40.0: Sim Helmet Camera (Side/Rear Mirrors eighth visible)
- 25.0: Dashboard camera
Anywhere from 60 down to 40 is what most people will go with.
The lower you go the less of the cockpit you see but you'll be amazed how it improves your distance perception and that helps with cornering. That's why my preference is 50 and lower.
Field of View (FOV) Calculators
The old projectimmersion.com fov calculator is sadly defunct but I'll keep the example here to give you a point of reference for whatever calculators remain, as they all put out the same values.
The Project Immersion.com FOV calculator is a handy site to calculate your correct FOV from the size of your monitors and how far away you sit. The “vFOV%” value it calculates a factor which should be applied against the default vFOV value in the GTR2\UserData\defviews.cam file:
LocalCam=COCKPIT // Inside View
{
  Fov=(112.0, 62.0) // Change 62.0 to the vFOV% value
  ...
}
ProjectImmersion.com says my GTR2 vFOV% is 40% so that means I should change 62.0 to 40.0. Try it out. I adjusted mine from the suggested value. You probably will, too.
Note! Select Race 07, GTR EVO (vFOV%) from the FOV Type drop-down for use with GTR2.
Seating Position
While not as important as FOV, one thing I've found handy is setting FOV about right and then using seat adjustment to bring the seat forward until the bottom edge of my screen is about in the center of the onscreen steering wheel. In other words, I move in until I can see only the top half of the brand logo in the center of the wheel).
Combined with FOV, this gives a decently immersive cockpit field of view experience, in my opinion.
Wheel Rotation and Wheel Lock
You’re probably on 900+ degree wheel, like a G27, T300, ClubSport, or modern Direct Drive wheel, so when you get into the GTR2 GT-style cars it will feel like you’re driving a bus: You’ll feel like you need to turn the wheel more than should be needed to get the car to turn the right amount – This is a wheel rotation and wheel lock setting issue.
It’s probably best to set a 540degree wheel rotation in your wheel profiles for GTR2. Then, in-game, the default 15degree wheel lock will feel better, but if it doesn’t try 18-22 degree wheel lock, give or take a few degrees. Somewhere in that range will be a 540degree sweet spot.
GTR2’s native in-game wheel rotation is 240degrees. I now set my real wheel to 240degrees to experience the game as it was designed. This makes things like default steering locks, virtual wheel rotation, and general handling feel much more in-sync and cohesive.
Update 2026: I've been using 360deg steering wheel rotation for quit a while now. It feels better to have the extra rotation and it matches closely enough to physical rotation that it doesn't become a distraction.
Tip: Adjust Wheel Rotation by Car and Steering Lock by Track
tl;dr Set your steering lock so that your hands never come off the wheel in any corner on the circuit.
Notes:
- Set wheel rotation to car class's real world, common wheel rotation:
- Cheatsheet: 180 for karts, 270 for F1, 540 for GT, and 720 for drift, 900 for consumer cars
- Set steering lock so that you never have to take your hands off the wheel to take any tight turns on a given track
- Increase steering lock if you find you're rotating the wheel more than you'd like
- Decrease steering lock if you'd like to have more rotation to use in turns
From a tip from The Iron Wolf on how he adjusts wheel rotation and steering lock:
- "It's probably not realistic, but for many years I've been following the setup guides that said to adjust steering lock so that you can take tightest corner on a track without letting go of the wheel."
- "because I use this advice, GTR2 240 visual range is actually enough most of the time, even though i use 180 for karts, 270 for F1, 540 for GT and 720 for older cars."
Controls and Hidden Keyboard Shortcuts
Here are some non-obvious controls and hidden keyboard shortcuts (also available at this Race Department post):
Race:
- Skip Grid Walk: Press Space Bar to skip the 'grid walk' the camera makes before the start of a race
FFB:
- ALT-F: Resets Force Feedback. Use it if FFB disappeared, if ffb feels wrong, or if ffb keeps pulling when going back to the garage.
- Side-effect: Reset to User PLR values undoing anything you might have changed in the in-game FFB screens.
- Alternative: Starting a replay (default bind: R) will reset ffb.
Cockpit:
- Left Mouse Button Click and Drag Forward/Backward: Adjust the horizontal seat positioning in cockpit view
- Right Mouse Button Click and Drag Forward/Backward: Adjust the vertical seat positioning in cockpit view
- Disable: Set Allow Mouse Seat Adjustment="0" in UserData\User\User.PLR ("Whether the mouse can be used to adjust cockpit seat position")
Field of View (FOV):www
- CTRL + Left Mouse Button Click and Drag Forward/Backward: Adjust the Field of View (FOV)
- Left Shift + Left Mouse Button Click: Resets FOV
- Disable: Set Allow Mouse FOV Adjustment="0" in UserData\User\User.PLR ("Whether the mouse+CTRL key+left button can be used to adjust FOV (left shift + left button resets FOV)")
Misc:
- F12: Save screenshot in BMP format to the GTR2 folder
- You can also press Print Screen and copy&paste to the Paint app
- Ctrl + F: show framerate in the game.
- Ctrl + G: Play the game in slow motion, like slowing the time.
- K: accelerates time in game.
- TAB: display multiplayer names
Cameras:
- Left-Shift: Cycle driving views: Cockpit, Nose Cam, Front Bumper, Chase Cam (Over Rear Wing)
- Insert: Cycle onboard views: Cockpit, Nose Cam, Front Bumper
- Home: Cycle external views: Nose Cam, Front Bumper, Rear Wing, Rear Bumper, Look-ahead Rear-left, Look-behind Rear-right, Look-ahead Front-right, Look-behind Front-left at Driver ("TV Cockpit")
- Page Up: Chase Cam
- Numeric Keypad:
- Direction keys (8-2-4-6) rotate camera around car: Up, Down, Left, Right
- Home (7): Zoom out
- PgUp (9): Zoom In
- Center key (5): Re-centers camera
- Numeric Keypad:
- Page Down: Trackside Cameras (Automatically changes camera as you drive around the track)
Defviews.cam:
- LocalCam=NOSECAM: Nose Cam
- LocalCam=COCKPIT: Cockpit
- LocalCam=TVCOCKPIT: Look-behind Front-left at Driver
- LocalCam=SWINGMAN: Chase Cam (Over Rear Wing)
- LocalCam=ONBOARD002: Nose Cam
- LocalCam=ONBOARD004: Front Bumper
- LocalCam=ONBOARD005: Chase Cam ("Over Rear Wing")
- LocalCam=ONBOARD006: Rear Bumper
- LocalCam=ONBOARD007: Look-ahead Rear-left ("On left of car")
- LocalCam=ONBOARD008: Look-behind Rear-right ("Looking back from right rear wheel")
- LocalCam=ONBOARD009: Look-ahead Front-right ("Looking forward from right front wheel")
- LocalCam=ONBOARD012: Chase Cam ("Thrill cam 2")
Defviews.cam has some duplicate configurations for pretty much the same camera views (Eg. Nose Cam, Chase Cam).
Replays:
- Click Full Screen button: Hide the replay HUD
- Click anywhere when replay HUD hidden: Show the replay HUD
- Delete: Hide the replay HUD overlay / Not working for me
- Numeric Keypad:
- Up: Rewind
- Down: Pause/Stop
- Left: Rewind
- Hold Left: Super fast-rewind
- Right: Fast-forward
- Hold Right: Super fast-forward
- Minus (-): Change focus to car behind
- Plus (+): Change focus to car ahead
- Enter: Return focus to player car
- Zero/Insert (0): Play
- HoldZero/Insert (0): Slow-motion
- Period/Delete (.): Play
- Hold Period/Delete (.): Super slow-motion
Driving Assists (Function Keys):
- Note: Driving assists are selectively enforced depending on your simulation level ie. Arcade/Novice/Semi-Pro/Simulation modes
- These enforcements be changed in GameData\Settings.DDB
- F1 – Steering
- F2 – Braking
- F3 – Stability
- F4 – Spin Recovery
- F5 – Damage On/Off
- F6 – Automatic Shifting
- F7 – Traction Control
- F8 – Anti-lock brakes
- F9 – Autoclutch On/Off
Defviews.cam (Texture Quality, etc.)
I wasn’t able to notice a change using negative values so it may be that the default value (0.0) is the optimum value, here.
Higher quality textures can be made to load in at farther distances by decreasing MipmapLODBias in UserData\defviews.cam. The effect is most noticeable on cars when increasing above 0.0: Textures look blurrier at closer distances.
Mipmaps are supposed to be about higher or lower quality textures but to be honest the effect doesn’t look like loading in higher or lower quality textures, it just looks like textures becoming blurrier at a distance. Maybe it’s just hard to tell.
Performance
Optimized Performance Settings
Overview:
- This section is meant to consolidate all settings that can be tuned to improve overall performance, mostly related to framerate and frametimes
- GTR2, while advanced for its time, suffers from some features not scaling up in performance as ideally as you'd like with newer hardware. That's why it's important to optimize where possible.
- Some settings may impact FPS while others may impact frametimes or other metrics that cause issues
- See Optimized Graphics Settings for a primer on the effect of enabling/disabling options like these
Settings:
- In-Game
- Options
- Video
- Shadows: High - GTR2 has sub-optimal shadow performance and some tracks use too many light sources which can potentially reduce FPS dramatically. This is not an issue for all or even most tracks but there are some.
- Personally, I keep Shadows at Full and try to fix the track, instead: #Fixing Track Shadows Instead of Car Shadows To Improve Performance
- Maximum Visible Vehicles: 30
- Set this to a number where you stop noticing cars pop in and out. The less cars you have to display the better your performance will be.
- Shadows: High - GTR2 has sub-optimal shadow performance and some tracks use too many light sources which can potentially reduce FPS dramatically. This is not an issue for all or even most tracks but there are some.
- Advanced
- High Detail Wheels: Disabled - You rarely look at wheels while racing so might as keep this disabled.
- Vertex Damage: Disabled - This is the dynamic body deformation that occurs when cars contact each other. This causes a spike in frametimes when enabled and contact occurs.
- Simple Debris Collision: - Enabled - This uses a simplified physics model for debris collisions (I think?) which should be more performant (I assume). Might as well enable.
- Super Fidelity Replays: Disabled - Actually, I just recommend disabling replays altogether under Replay until you need to record a replay but doesn't hurt to disable it here.
- Race Data Acquisition: Disabled - This supports MOTEC (I think?) so if you're not using it there's no reason to have it enabled.
- Video
- Replay
- Replays: Disabled - Only enable when you want to record a Replay. Potentially impacts FPS and frametimes.
- Options
- UserData PLR
- Tire Sampling: Disable - "Waste of CPU" according to comment in file. Test it and choose what you prefer. Otherwise, best to simplify and save any hit at all to fps/frametimes.
- Tire Sampling="0" // 0 = normal, 1 = extra HAT samples (*slightly* more accurate over sharp curbs, otherwise a waste of CPU)
- Tire Sampling: Disable - "Waste of CPU" according to comment in file. Test it and choose what you prefer. Otherwise, best to simplify and save any hit at all to fps/frametimes.
Improve Frame Rate by Making GTR2 Use More Cores For Better Performance
By enabling GTR2 to use all cores, you can significantly increase your FPS, perhaps by more than 2x. It's an absolute must.
The Crew Chief GTR2 Enhancements Plugin enables using all cores by default. Otherise, use the free Bill's Process Manager or the paid Process Lasso (I paid for it, I think it's worth it for other old games like GT Legends, Race 07, etc.).
There are other applications that do the same thing, too. Try a google for “window cpu affinity tool” if you’re looking for a different one.
How to use Process Lasso with GTR2:
- Start Process Lasso
- Click Options menu > “Configure default CPU affinities …”
- Process name: GTR2.exe
- CPUs: All
- Click “Add to list” button
- Click OK
- Click Options menu > “Configure default CPU priorities”
- Name match: GTR2.exe
- Select “High” from the priority drop-down
- Click “Add to list” button
- Click OK
- Start GTR2 and enjoy better performance!
Remember: Process Lasso must be running before you launch GTR2.
Note: Some have said more than two cores assigned to GTR2.exe doesn’t seem to make a difference. I’ve seen GTR2 use 4 cores, myself, but it certainly gets the biggest boost from 2, then less of an improvement as you add cores. I just enable them all for convenience.
GTR2 and Core and Thread Configuration
Disable Vertex Damage to Reduce Frametime Spikes During AI Collisions
- Disable Vertex Damage under Options > Advanced
- This will reduce the spike in frametimes that occur when AI's collide with each other by eliminating the need for the game to compute and render damaged bodywork
- Note that body parts will still fall off, it's just the dynamic bodywork deformation that is no longer shown
Enable Simple Debris Collision To Reduce CPU Load
- No need to waste precious CPU/GPU resources on debris collisions on the track when they don't look or act all that great to begin with
- Realistically, this isn't probably saving all that much CPU time but if you're looking for anything it's worth a try
Disable Replay Recording To Reduce CPU and Disk Load
- Disable replay recording to reduce CPU and memory/disk load. This may reduce the potential for stuttering, improving visual fluidity.
- I find I often don't have a need for replays, so it doesn't hurt to leave it off until I need it
Disable Extra Hat Samples Tire Sampling
- Users who have edited the UserData User.PLR file may have noticed this parameter:
- Tire Sampling="0" // 0 = normal, 1 = extra HAT samples (*slightly* more accurate over sharp curbs, otherwise a waste of CPU)
- Disable it. If in doubt, test it on and off yourself.
- Gaining back CPU is one of the most important performance goals in GTR2 because it is so CPU bound and CPUs haven't really improved single-core performance all that much since GTR2 was originally released.
Frame Generation - But you probably don't need it with GTR2
- Lossless Scaling can generate frames in the same way as NVIDIA's DLSS or AMD's FSR and it's arguably more convenient to use and more compatible as it doesn't need games to support it
- Try the other performance tips first. This should be a last option if you're desperate.
- This might be of help to people on older hardware or laptops with integrated GPUs
GTR2 and Lossless Scaling Frame Generation
- Yes, it works with both Vanilla Steam GTR2 (D3D9) and CCGEP Steam GTR2 (DXVK)
How frame generation looks and feels with GTR2:
- 15fps to 60fps 4x frame gen:
- Driving feels great but GTR2's FFB is tied to its native refresh rate and FFB feels bad at 15fps
- There is some trippy visual fluidity and it's hard to drive with
- 30fps to 60fps 2x frame gen:
- Driving both looks and feels quite acceptable
- Quite playable
- 60fps to 120fps 2x frame gen:
- Driving feels good and visuals look good
Recommendation:
- For how cheap Lossless Scaling is, I'd recommend it for low spec GTR2 gamers
Why it benefits low spec gamers:
Here's why, if you're already maxxed out, it still benefits low spec gamers...
- Frame generation is lighter than fully rendering new frames
- So, you can frame gen more frames than you can just using those resources to generate real, rendered frames
- Try capping your framerate, if already at 100%, to free up GPU to use for frame generation
- Try lowering your graphics settings a little bit, as well, if neeed, to free up GPU resources to generate more frames
Notes:
- It appears recording doesn't capture the visual fluidity or the visual trippiness at low boosted framerates. So, even though I recorded some footage, it didn't convey what I was seeing or feeling. 30fps is roughly the minimum native frame rate to boost from and anything lower creates a very unpleasant visual experience.
Graphics
SRPL/SSTR ShaderPacks
Comments by Bjarne Hansen [10]:
- The SRPL shaders was made by K_Szczech from SimRacing.PL for Rf1 back a long time ago.
- A huge job as he also released tools, emaps and GMT to make use of them.
- Later a couple of guys released the SSTR version as K_Szczech wanted people that used his shaders to ask permission for each project and they had to be original projects.
- Not sure who changed the structure of the files so they could be used in Gtr2? It could have been Scorpyo who has made a lot of mods using those shaders.
- The two sets are identical and if you want to make use of them copy the one set ether SSTR or SSPL into the root folder of GTR2
- To use the shaders you need to put the same set of files /folders into the 'hardwareshaders' folder in 3dSimed and select the GMT you want try.
SRPL and SSTR shader for GTR2 Tutorial By Haruo [11]:
- Now, i have made tutorial how to add SRPL and SSTR shader for GTR2
- link for tutorial and SSTRxSRPL shader pack for modder use with 3dsimed [12] [13]
- SSTRxSRPL shader pack for user in game.rar [14] [15]
- link for SRPLxSSTR cubemaps & Shader tool.rar [16] [17]
- SSTR shader is some enhanced version of SRPL shader and (my opinion) use for avoid permission for use SRPL shader because K_Szczech (SRPL shader author) won't use him shader for illegal mod.
Comments by Shovas:
- sstr-srpl-shaderpack-sho-collected-240324.zip - My collected shaderpack files
- I compared this with a 2019 mod and found there were no diffs and only three extra files in my set so I decided to stick with my set
- It doesn't look like there's been much development beyond 2012 on the shaders so it seems pretty static
- No need to be overly worried about having the correct files, apparently, you probably have them already.
Force Feedback (FFB)
SHO Competition FFB
Consider CCGEP FFB Options before trying this. CCGEP Steering Force FFB is the newest and most advanced FFB implementation available for GTR2.
See the earlier #Force Feedback Settings section.
SHO Competition FFB for GTR2 is a mod that crowd-sources wheel-specific FFB parameters.
Click here for SHO Competition FFB for GTR2
Here are the wheels currently tuned (as of June 2022):
- AccuForce V1: User - AccuForce V1 by Shovas.PLR [Wheel Software Profile Available]
- CSL Elite: User - CSL Elite by ToddMcDanger.PLR
- CSL DD: User - CSL DD by ToddMcDanger.PLR [Wheel Software Profile Available]
- CSW 2.5: User - CSW 2.5 by Strenski.PLR [Wheel Software Profile Available]
- Driving Force GT: User - Driving Force GT by BlackMarketBlood.PLR
- Fanatec DD1: User - Fanatec DD1 by The Iron Wolf.PLR
- G920: User - G920 by Jean-Paul Sarti.PLR
- Simucube 2 Pro: User - Simucube 2 Pro by Shovas.PLR [Wheel Software Profile Available]
- T300: User - T300 by Paokkerkir.PLR
- TC-PC Racer: User - TC-PC Racer by Machiavelo.PLR
- Thrustmaster T-GT: User - Thrustmaster T-GT by WesBrook77
Shovas Custom FFB Files (Obsolete)
Before I created SHO Competition FFB, for crowd-sourced wheel-specific FFB parameters, I published “Custom FFB Files”. I no longer recommend or support these as they have been far surpassed by SHO Competition FFB.
RealFeel FFB
I am increasingly leaning towards RealFeel FFB as the universal drop-in solution for GTR2 FFB as it requires less tuning, has simplified global and per-car configuration, tire-at-rest physics, and potentially has better physics-to-ffb implementation vs original game FFB and SHO Competition FFB.
RealFeel FFB is enabled by Crew Chief GTR2 Enhancements Plugin by The Iron Wolf. I highly recommend it. -Shovas
Guidelines for Tuning GTR2 Force Feedback
- Tune one FFB parameter at a time
- Do NOT use Vsync or Frame rate capping
- Frame rate matters to GTR2 FFB. The FFB update loop is tied to the frame rate so a 50fps FFB experience will feel differently than a 100fps FFB experience. The more FPS you have the better FFB will feel.
- Change as little as possible to avoid variables throwing off your tuning
- Save a race session and keep using it every time you exit and enter GTR2 after changing FFB parameters
- Use the same track
- Use the same car
- Use the same setup – including things like tire types, pressures, etc.
- Certain effects play off each other:
- Grip Weight vs Grip Factor
- Reducing/Increasing Grip Weight can Reduce/Increase the Grip Factor effect so you may need to make an opposite adjustment to Grip Factor. The opposite can also happen: Changing Grip Factor might require a need to adjust Grip Weight.
- Grip Weight vs Grip Factor
- Use bi-section searching to tune FFB parameters to reliably dial in your settings and help avoid bias and false leads.
Force Feedback Tweaking Guide for Simbin Games by Julien Regnard
Helpful Guide for Advanced Force Feedback Tweaking
Check out this guide, Force Feedback Tweaking Guide for SimBin Games, for helpful descriptions and tips for advanced force feedback tweaking using the UserData PLR files.
Pro Tip: What do the FFB Effects Levels mean?
- Low: Steering + Grip
- Medium: Adds Friction + Damper + Rumble strips
- High: Adds Brake vibration
- Full: Adds Throttle vibration + Steering vibration
Rumble Strips Pushing/Pulling the Wrong Way
Update 2024-07-06: You should probably just disable this by zeroing it out. It's a fake effect, anyway. The feel of the ffb over real 3D curbs is enough for me.
I noticed rumble strips were pulling me off track instead of tending to push me back on track. Luckily, I noticed an FFB setting:
Update 2017-11-10: I believe I was wrong about the feel of this. I now feel there’s some legitimate drag to larger, more raised kerbs (eg. at Spa) and some kerbs lift your rear tire enough to lose grip on the backend thus acting like sliding on the backend and feeling like being “pulled” off the track. Consider reducing Spring and/or Fast Bump/Rebound to deal with this. My Pull Factor FFB setting is now the default 1.5.
- FFB rumble strip pull factor=”-0.890625″ // How strongly wheel pulls right/left when running over a rumble strip. Suggested range: -1.5 to 1.5.
- Looks like this should be negative: -1.50000
- My bisection search: -1.5, -0.75, -1.125, -0.9375, -0.84375, -0.890625
- Positive vs negative could be wheel dependent. So you’ll have to test to make sure.
- You may want to tweak this value. It’s a little strong feeling for me.
- Looks like this should be negative: -1.50000
The GTR2 Force Feedback Engineer
Inspired by the Project Cars 2 Race Engineer, which provides an in-game question and answer interface to solving car setup issues, I thought I’d document the same kind of thing for GTR2 from a Force Feedback perspective.
In GTR2, and probably most early SimBin titles, the most important Force Feedback tuning parameters are not exposed by in-game settings. These settings include Force Exponent, Grip Weight, Grip Factor, Friction Coefficient, and Damper Coefficient. You’ll need to edit your UserData\USER\ PLR file to change these settings.
Engineer: What’s the problem?
Driver: Well,
- I can’t tell when I’m losing grip. The wheel doesn’t go light enough when I’m losing grip.
- Increase Grip Weight
- Increases Grip forces, which decreases Steering forces at the same time, which increases wheel weight loss due to grip loss and can help you identify when grip has been lost because the wheel feels lighter.
- Increase Grip Weight
- The wheel goes too light when I’m losing grip.
- Decrease Grip Weight
- Decreases Grip forces, which increases Steering forces at the same time, which reduces wheel weight loss due to grip loss and helps keep the wheel forces stronger.
- Decrease Grip Weight
- The wheel feels loose or force feedback is weak on straights, in corners, everywhere in general.
- Decrease Force Exponent
- Compresses forces over a narrower range, so more total force, so that forces are compressed around center causing the wheel to feel tighter or forces to feel stronger.
- Decrease Force Exponent
- The wheel feels tight/jittery around center on straights.
- Increase Force Exponent
- Evens out forces over a wider range, so less total force, so that forces are not all compressed around center causing high forces or spikes which you feel as tightness or jitteriness.
- Increase Force Exponent
- There’s too much centering spring feeling in the wheel.
- Increase Force Exponent
- Evens out forces over a wider ranger, so less total force, so that all combined forces do not cause too much force towards the center.
- Increase Force Exponent
- The wheel force feedback goes ‘numb’ during hard or high speed cornering. I can’t feel anything.
- Increase Force Exponent
- Evens out forces over a wider ranger, so less total force, so that all combined forces do not overwhelm the wheel and cause ‘clipping’ (ie. max force reached so can’t feel any more forces, it just feels dead) and this should allow forces, while somewhat weaker, to still be felt.
- Increase Force Exponent
- I can’t feel the road, such as bumps, lines, or contours.
- Increase Grip Weight
- Increases Grip forces which are affected by road bumps, lines, and contours, so your wheel will emphasize greater and lesser weight feel that help identify road feel through force feedback.
- Increase Grip Weight
- I can’t catch the car when the backend loses grip and slides out.
- Increase Grip Weight
- Increases Grip forces, which lowers Steering forces at the same time, which provides emphasized grip information through force feedback that should help you catch backend slides more easily.
- Decrease Grip Factor
- Decreases Grip forces from the front tires, which increases Grip forces from the rear tires at the same time, which provides emphasized rear grip information through force feedback that should help you catch backend slides more easily.
- Increase Grip Weight
- There’s not enough resistance when I turn the wheel, in general.
- Increase Friction Coefficient
- Increases constant friction forces so the wheel feels heavier to turn. Real steering columns have inherent friction so tuning friction can make it feel more realistic.
- Increase Friction Coefficient
- There’s too much resistance when I turn the wheel, in general.
- Decrease Friction Coefficient
- Decreases constant friction forces so that the wheel feels lighter to turn. Real steering columns have inherent friction so tuning friction can make it feel more realistic.
- Decrease Friction Coefficient
- The wheel rotates too quickly during some forces, like there’s not enough resistance. It doesn’t behave like a real wheel.
- Increase Damper Coefficient
- Increases the fluid dampening applied to forces so it will spin up more slowly
- Increase Damper Coefficient
- The wheel rotates too slowly during some forces, like there’s too much resistance. It doesn’t behave like a real wheel.
- Decrease Damper Coefficient
- Decreases the fluid dampening applied to forces so the wheel will spin up more quickly.
- Decrease Damper Coefficient
- Wheel forces feel like they’re clipping in high ffb strength scenarios but I’m not even at max FFB strength on the wheel.
- Decrease Steer Force Output Max
- Reduces the amount of strength applied to steering forces and frees up FFB strength headroom for road bumps preventing force clipping in high ffb strength scenarios like high speed corners.
- This is known as ‘soft clipping’ where your wheel FFB strength has sufficient strength but the in-game calculations are overwhelming their own maximum FFB strength output. This results in numb steering forces taking up 100% of the in-game FFB output and providing no room for road bump forces which provide feeling on the road.
- Caution: Damper and Friction will become increasingly apparent as you decrease Steer Force Output Max and you will want to adjust them accordingly.
- Decrease Steer Force Output Max
Peripherals
TrackIR Head Tracking
TrackIR is a great step if you’re not yet willing to go to VR, like myself, and the good news is GTR2 supports it out of the box!
I find it works extremely well to achieve the ability to look around the cockpit, at your mirrors, and out your side-windows on a single screen. You should find slides easier to notice and correct as your head stays looking in the direction you want and your car rotates around you – as you would expect in real life. The added head movement also gives you a slight depth-perception improvement due to subtle angle-of-view changes as your car moves, your head moves, and bumps affect your cockpit movement.
Here are my TrackIR settings: The settings mainly try for 1:1 head movement while looking at your cockpit and mirrors, and then accelerates so that you can look out your side-windows without straining your neck too far.
-
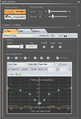 Shovas Early TrackIR Profile
 -
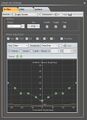 Shovas Single Screen TrackIR Profile
 -
 Shovas Calm TrackIR Profile
 -
 Shovas Calm V2 TrackIR Profile
 -
 Shovas Calm V3 TrackIR Profile


Notes:
- Over time I have tried to 'calm' the acceleration of head movement that these profiles generate
- I only really need to easily see my side mirrors and, at a stretch, see beside me so the calmer the better
- Calmer profiles make for better videos when I record them
- So, presently, I'm probably using the calmer versions of the profiles mentioned above
TrackIR Fix for Camera Uphill/Downhill Extreme Angles
GTR2 In-game - World Movement: 15% (240823)
I've been re-tuning this to achieve a more realistic, dynamic, and immersive cockpit view. In a car, the car itself is bouncing around causing what looks like "world movement", and the driver is also bouncing around in their own way causing what looks like "car movement".
There is a balance between world movement and car movement that is the best compromise for realism and immersion in a sim. So try something in between the extremes of 0% and 100% World Movement.
Notes:
- Higher World Movement decreases car movement
- Lower World Movement increases car movement
- Zero World Movement is lock-to-horizon
- This is a problem for TrackIR users who have free head movement
- Your brain stabilizes what your eyes see in real life so that it doesn't feel as shaky as it feels when you're racing in a sim or watching a live onboard
- This means that large and small shakes are stabilized but large shakes will still be quite noticeable
- This is why probably the right World Movement value lies between 0 and 50% (probably between 10 and 30%) because your brain stabilizes the relatively smaller shaking of the world more than the relatively larger shaking of the car around you
- Things closer (ie. the car) tend to appear to shake more than things farther away (ie. the world)
Old Notes (Pre 240823):
- TrackIR users probably want to set Video options World Movement to 1% (not zero) or higher to stabilize the vertical angle of the cockpit camera to the angle of the car so that when you’re going up or down a steep hill you don’t lose sight of the bonnet of your car looking too far up while going downhill or end up looking at your feet looking too far down going uphill.
- Zero World Movement is lock-to-horizon, I guess, and to me that doesn’t work for TrackIR users.
- World Movement greater than 1% causes your cockpit camera to stabilize with the car angle but the “world” (ie. what you see of the car and the track) ends up bouncing around so a high World Movement number isn’t great, either.
So 1% seems to minimize ‘world shake’ and stabilize the cockpit camera to help when you’re going up and down hills.
Testing Notes (Late 2024):
- No TrackIR and 0% G-Force Simulation: 100% Camera locked to car, car steady, world moves. 50% Camera still locked to car, car steady, world moves but less I guess. 0% same as sefore, world steady, car moves, but camera must be fixed to something (I previously said 0% = lock to horizon so maybe it's that).
- Adding in G-force Simulation unlocks camera pitch but not yaw or roll it seems but I do have a heady physics mod active
- but I think disabling g-force simulation disables the head physics mod since I didn't see any head physics movement
- I just asked ChatGPT if it had to guess how much your brain is stabilizing the visual from eyes in a race car situation with a driver bouncing around inside a bouncing car and it said 70-90%. I could bet it's north of 50% anyway.
- So < 50% World Movement, tune as desired
Accessibility
Keyboard and Mouse-steering Gameplay
- A lap around Monza in the Ferrari 550 Maranello with MOUSE | GTR 2 [Video] - Todoroki 07 Yt (2026) -
- "Here's a lap I did around the Monza circuit in the Ferrari 550 Maranello WITH MOUSE AND KEYBOARD, because if living in Venezuela was hardcore, this is even more so."
Understeer Physics Mod by Usp-Elias for Improved Accessibility on Keyboard and Gamepad
This little mod replaces the handling of all the cars with the one of the 350Z, giving them physics similar to that of Gran Turismo 4 understeer cars, it also makes them less prone to spin. All of this makes the game more accessible to play on keyboard or gamepad. The mod also comes with some tweaks from my Alternative BoP mod. [18]
Language and Localization
Replace your UIDATA GAME.DIC file with your preferred language DIC file
- tl;dr Copy and rename your preferred languages .DIC file to GTR2\UIData\Game.DIC
- Download Language Game.DIC Files - Find the files in the Power and Glory Language Dictionaries folder
Mods - Modders - Modding
Resources for Modding
Modders tend to congregate in various forums around the internet. See #Community above for a list of sites, what they offer, and if modders tend to hang out there.
Discords
- Simwiki Discord
- Crew Chief GTR2 Enhancements Plugin Discord
- Crew Chief Discord
- The Pit Stop Discord
- GTR24Ever Discord
- FRM Modding Team Discord
- Historic Racing Sports Community Discord
- Classic Motorsport Hub Discord
Documentation
- isiMotor 2 Community AI Documentation - Tuning Driver AI Opponents
- isiMotor 2 AI Guide PDF by Exefune (Converted to GitLab Website by MJQT)
- See IsiMotor for more information
YouTube Modding Tutorials
Modders:
- GTR2 - Adding a 'no rear wing' option - Simspeed Racing (2022)
- GTR2 Engine Life Function Explained - Part 1 of 3 - nolimitphil (2022)
- GTR2 Paint Installation Tutorial - 14stockfan (2017)
- GTR2 2017 / Short tutorial for resized bumper in Bentley Continental GT with 3dSimed - "YouTube Music Channel" (2017)
- GTR2 Mod & Tracks Installation Tutorial - GERMAN - DEUTSCH - HD - der_Hoffi (2012)
- GTR2 Skins Tutorial Export DDS files - GTR2Tutorial (2009)
- GTR2 Skins Tutorial Import and Finish - GTR2Tutorial (2009)
- GTR Skins Tutorial Copy files needed - GTR2Tutorial (2009)
- GTR Skins Final step - GTR2Tutorial (2009)
- GTR2 Slip Curves And Grip Levels - Man Hobby Channel (2011)
Users:
- Winlator - GTR2 & Power and Glory Mod v3.2, installation tutorial - Winlator@Frost 10.0b2 V1 - Dzonix Zigzag (2025)
- Installing GTR 2 PC Tutorial - Oldie Newie (2024)
- GTR2 Autosim Weather Generator Quick and Dirty - Shovas (2024)
- Tutorial | How to mod GTR2+PnG - iKR [iKeysRacing] (2023)
- How to join my own GTR2 Racing league + how to install gtr2 mods - Pizzar (2023)
- How to get Mods for GTR2 - ZIGAG (2022)
- How to get sounds in GTR2 mods that hasn't got an engine sound - J J Speed 59 (2022)
- Tutorial: How to Install Mods in GTR2 - RaceDepartment (2019)
- GTR 2 - Xbox 360 controller settings - FS7x-gaming (2018)
- GTR2 Mod Installation Tutorial - 14stockfan (2017)
- GTR2 Track Installation Tutorial - 14stockfan (2017)
- GTR2 Multi core performance increase - Billy Bong (2015)
- How 2 skin import - GTR2 Series (2015)
- GTR2 Motec - Evoluti0nz (2013)
- Sim Racing Tech - Episode 3 - Install MoTec for GTR2 - Sim Racing Tech (2013)
- Sim Racing Tech - Episode 4 - SimUtils Race Manager and Data logger - Sim Racing Tech (2013)
- Sim Racing Tech - Episode 2 - 4GB patch - Sim Racing Tech (2013)
- GTR2 dedicated server restart macro - Man Hobby Channel (2013)
- GTR2 and General Sim Racing MoTec Course - Man Hobby Channel (2012)
- GTR 2 / World Movement Setting - Itsphait (2011)
- Unlock All Tracks in GTR2 - HappymanSeven (2009)
Modders
- Here's just some of the modders I know of or have interacted with over the years.
- Some active modders may have moved on to other sims but I listed them as active anyway
Active Modders
- Basukid - Cars - Trackaholics, European Endurance Center
- Bjarne Hansen, Aka 'Syhlif32' - Tracks - Overtake / Race Department, European Endurance Center
- Caribstu - Tracks - YouTube, Overtake / Race Department
- derDumeklemmer - Tracks - Festbierbude
- Durge Driven - Skins - Overtake / Race Department
- Fatguts - Evolution Modding
- Furinkazen - Tracks -- Site
- Fransrosenberg aka Jim Clark aka Snarf7 - Tracks - Trackaholics, Evolution Modding
- LeSunTzu - Cars - lesuntzu.wordpress.com
- Markano97 - Cars - Facebook
- Pawel - Tracks - Trackaholics, European Endurance Center (GTR2 Endurance), Evolution Modding
- Philrob - Tracks - Evolution Modding, Overtake / Race Department, F1Classic
- Pixiv13164 - Trackaholics
- Scorpyo - Tracks - Trackaholics
- Shovas - AI, FFB, Real Weather for CCGEP, SimHub Overlays, HD Mirrors, ReShade Presets, Specialfx, SHO PnG Retrofit - Simwiki.net (Including Mods), YouTube, @shovas on Discord, The Pit Stop Discord, Crew Chief GTR2 Enhancements Plugin Discord, Trackaholics, European Endurance Center, Evolution Modding, Overtake / Race Department
- SIDStalker - Cars - Trackaholics, YouTube
- SiGi - Cars, Tracks - eSport-Racing.de
- Speedster63 - Cars, Sounds - Homepage, Trackaholics, Evolution Modding
- Sunalp2 - Tracks - Trackaholics, Overtake / Race Department, Evolution Modding, F1Classic
- Sylphide - Cars, Skins - European Endurance Center
- The Iron Wolf - Crew Chief, Crew Chief GTR2 Enhancements Plugin (CCGEP) - YouTube, Crew Chief, Trackaholics, European Endurance Center (GTR2 Endurance), Evolution Modding, Overtake / Race Department
- Triebie - Cars, Blender, 3DSimEd - European Endurance Center
- Weber - Cars, Blender, Decimate, 3DSimEd - European Endurance Center
- Wingnut - Cars - Trackaholics
- Zipdrive - Overtake / Race Department
- Zwiss - Tracks - Overtake / Race Department
Inactive Modders
- Bill Guillaume - Tracks
- DutchDevil - Tracks
- Freeracer - Cars - Trackaholics, Evolution Modding, F1Classic
- GPLea - Tracks
- GTR233 - GTR2 Anniversary Patch, Cars, Tracks, Fixes - Overtake / Race Department
- Kinnunen
- lasercutter - Tracks - Overtake / Race Department
- Motorfx aka Ken H - Tracks
- N2LO - Tracks
- Neel Jani - Tracks - Neel Jani's Forum
- SilverSun - European Endurance Center (GTR2 Endurance)
Mods
Tip: Use VirusTotal.com when downloading files to quickly and automatically scan a file with all (or at least most) of the anti-virus and anti-malware solutions out there.
Race Department.com is one of the best, cleanest, and most professional of the sim racing sites I know of that also host downloads section. I highly recommend registering for ~$3/month or ~$15/year for unlimited downloads and removing all ads, amongst a host of other perks.
Other sites that curate mods and other downloads include eSport-Racing.de, Koelschbierbude.de, and Festbierbude (GTR2 Power & Glory Mod Focused).
Trackaholics and European Endurance Center (GTR2 Endurance) have dedicated Release forums where modders regularly post new and updated releases.
Check out the #Community sites for more details.
Running Mods
Generally speaking, the process of adding cars, tracks, or mods usually just involves a download and then copy&pasting the files into your GTR2 folder. Usually, it’s pretty straight-forward, although sometimes authors don’t use a consistent folder structure and you may have to figure out where files go (ex. track mods often give you the files but not the folder structure – track mod files should go in GTR2\GameData\Locations\FolderName).
Finding Mods
Search my @shovas YouTube channel for an ever growing list of GTR2 track videos including download links and full details in the description of every video.
- For circuits, go to wikipedia, find the circuit, and see if it goes by any other names
- Circuito Ayrton Senna:
- Also known as CAB Circuit
- May be called 'Salvador'
- And another track, Goiânia, is now called a similar name, Autódromo Internacional Ayrton Senna
- Canadian Tire Motorsport Park aka Mosport but mods might call it Bowmanville or even Toronto
- Autódromo Brasilia BRB is also known as Autódromo Internacional Nelson Piquet and was previously known as Autódromo Emilio Medici and Autódromo de Brasília
- Circuito Ayrton Senna:
- So, you'll have to learn the possible keywords and then you'll be able to search for those keywords
- Next, I search those names on a collection of sites known for hosting or linking GTR2 mods:
- Google | DuckDuckGo | Brave (Prefix any search with "gtr2")
- Trackaholics (Search)
- European Endurance Center (GTR2 Endurance) (Search)
- Evolution Modding (Search)
- F1 Classic (Search)
- GT Italia - Search
- Driving Italia - GTR2 Category (See Subcategories)
- eSport-Racing.de (eSport Racing Index)
- OverTake (Formerly Race Department) (Search)
- Festbierbude.de (Search)
- Koelschbierbude.de (Search)
- MediaFire Trend Search) - A search engine for MediaFire links found on the internet. Many GTR2 links in search results.
- Forum Thead listing 797 GTR2 Tracks and Links (Backup) - Many links dead, some might work, good way to check if some track was ever made for GTR2
- Alternates
- YouTube - Try searching YouTube as video descriptions or comments will sometimes contain download links
- Some sims have tracks that can be trivially converted to GTR2
- So try searching these alternate sites
- GT Legends:
- BMW M3 Challenge:
- Give it a try, you'd be surprised how many little known mods are actually available
Download Sites For Mods:
- See GTR2#Download_Sites_For_Mods which also includes cloud drive mirrors of some download sites, ftp servers, etc. that have been available and may have gone defunct over the years
If you still can't find a download available for a mod:
- If you absolutely can't find something mentioned on Simwiki, ask on our Discord or Forums and we'll try to help.
Hosting Mods
Internet Archive (Archive.org):
- The Internet Archive (Archive.org) is a great option for hosting your personal mods
- Already a proven website with a long track record
- Trused by many retro communities
- Generous with space
- Automatic directly hosted downloads and automatically generated and seeded Bittorrent downloads
- Worth your donations to help support
Mod Package Managers
Mod package managers enable one-click install and uninstall operations for mods with the same folder structure as the GTR2 folder. Most modders do this but if not just re-create their archive with the proper folder structure and it will work.
- Open Mod Manager (OMM) - Successor to OVGME by the same author (Recommended by Shovas)
- OVGME Generic Mod Enabler - Succeeded by OMM
- JSGME Generic Mod Enabler - Succeeded by OMM/OVGME
Modding
In 2024, the best places to get into GTR2 modding are probably Race Department, Trackaholics, and European Endurance Center.
Modding Tools
Note: Tools here will eventually link to Simwiki generic tool pages as applicable.
- 3DSimEd
- Geditor - Pack/unpack .GTR and compatible archives often used in IsiMotor games
- Bob's Track Builder - Build tracks (Homepage)
- Guitarmaen AIW CAM Editor - See also GTR2 Tools Blender Addon
- GTR2 Tools Blender Addon - Potential alternative to Guitarmaen AIW CAM Editor.
- GTR2 Tools Bundle
- Modding Tools & Tutorials for GTR2 by eSport-Racing.de
- GTR2 Tools Blender Addon - Blender Addon -- GTR2 Tools (AIW, CAM, more) by TShirt
- Scope: Import/export of spatial data from text-based files; providing contextual and nuanced tasks.
- Status: [AIWED] c.98 pct. --- [filebin] c.70 pct. --- [CAMED] complete --- [gmt_imp] basic
- Scripted on Blender v2.92.0
- Feb. 24, 2025 --- RELEASE gtr2tools v.0.0.5
- This version adds grid and pits features to the AIW editor.
- Pls find install notes within zip: xADVISORY - gtr2tools
- Author TShirt is with us on the Simwiki Discord
- GTR2 Tools -- Pending Scripts (.py) by TShirt
- Memory Operations/Manipulation - memops
- Shared Memory Data Explorer - ui_smde, smem
- .RCD Editor - rcd_edit
- Savegame Editor - sve_edit
- Author TShirt is with us on the Simwiki Discord
Modding Help
Modding Checklists
Mod Car Checklist
TODO
Mod Track Checklist
- GDB
- VenueName:
- Prefer formal names except when an informal name is very, very well known
- Include informal names or nicknames after formal names
- Include year of the track the mod represents
- Append Layout Suffix on end
- Eg. "Sarthe, Circuit de la (Le Mans) 2019"
- Use abbreviations for very long names
- Eg. Can. Tire for Canadian Tire
- Use initials for common phrases like "Motorsport Park" (ie. MP)
- Do not include version numbers
- Template:
- <Well Known Name> (<Nickname>) <Layout> <Year> <Series> <Tags>, <Common Prefixes>
- Nickname = Mosport, Brno, Valencia, etc.
- Layout = Grand Prix, National, Motorcycle, Training, etc.
- Year = 2025, 2005, 1990, 1967, 1932, etc. (4 digit prefered or 'YY to save space)
- Series = ALMS, ELMS, BTCC, etc.
- Tags = "[Virtua_LM]"
- Common Prefixes = "Circuit ...", "Autódromo ...", "Motorsport Arena ...", etc.
- Exclude Common Prefixes or shorten to acronym if display space is limited
- Short Forms (only if needed to fit in display space):
- A.: Autodromo
- C.: Circuit
- Is.: Island
- Int.: International
- SC: Street Circuit
- RC: Race Circuit
- MP: Motorsport Park:
- Strip vowels for some words
- Rcwy: Raceway
- Acronyms for any other common descriptive words
- MS: Motor Stadium
- <Well Known Name> (<Nickname>) <Layout> <Year> <Series> <Tags>, <Common Prefixes>
- Examples:
- Baltimore, Grand Prix of
- Can. Tire MP (Mosport) 2012 ALMS
- Cascavel, Autódromo de
- El Zonda (Autodromo Eduardo Copello)
- Hockenheimring GT Masters
- Keimola GP 1966/2007
- Kielce, Tor
- Laquais, Circuit du
- Le Mans 1991 [Virtua_LM]
- Madonie, Circuito delle
- Magione 2012 (Autodromo dell'Umbria)
- Man, Isle of, Mountain Course
- Monza BES
- Motegi, Mobility Resort
- Nordschleife ADAC 24h 2007 NoS Fall
- Nordschleife Tourist 2007 NoS Fall
- Oulton Park 2005 Classic/Fosters/Int./Island
- Road America IMSA
- Taupo Int. MP 2005
- Zolder, Circuit
- Region
- North/Central/South
- This is a mapping to skies which are literally named Skies_North, Skies_Central, Skies_South
- What the Skies actually look like is actually up to the Skies author but for my purposes I have chosen to consider North/Central/South as follows
- I consider North/Central/South to be determined by the Location's GDB Latitude' setting
- North: Tropic of Cancer runs East-West through Mexico, the Sahara, Saudi Arabia, India, Thailand, and Southern China [21]
- Central: Between Tropic of Cancer and Tropic of Capricorn
- South: Tropic of Capricorn runs East-West through very Northern Argentina, very Southern Brazil, very northern South Africa, and mid Australia [22]
- The following feels roughly correct for North/Central/South regions but I have no solid evidence these represent the actual implementation of original Skies or mod Skies.
- North:
- Latitude is north of the Tropic of Cancer (sort of a quarter way between the equator and north pole)
- Central:
- Latitude is between the Tropic of Cancer (North) and Tropic of Capricorn (South), ie. around the equator
- South:
- Latitude is south of the Tropic of Capricorn (sort of quarter way between the equator and south pole)
- How to determine Region:
- Find on online maps and then compare to a globe with the equator and tropic of cancer and capricorn depicted (use an image search engine to find one).
- Latitude
- Latitude affects day/night length, used with date.
- Latitude also controls the sun/moon vector across the sky
- How to find: Online Maps
- NorthDir
- NorthDir controls where sun rises/sets
- How to find: AI Chatbots
- Race Date
- RaceDate affects length of day/night, used with latitude
- How to find: AI Chatbots
- Bumps and Bounces
- Keep RoadBumpAmp and RoadBumpLen reasonably low.
- Recommend 10% of default RoadBumpAmp eg. Donington
- Track may be using defaults in Specialfx.tec
- Notes: https://trackaholics.forumotion.com/t7871-modified-specialfx-tec-file#150298
- Keep RoadBumpAmp and RoadBumpLen reasonably low.
- VenueName:
- Track
- Shadows
- Many shadows / many dynamic shadows can cause low framerate or regular framerate hitches
- Check all shadow levels
- Pits
- Check pit out arrow
- Your pit guy should stand on the opposite side of the direction you will turn out of the pits
- If you turn right to exit pits then he should be on the left
- Rain
- Always check dry and rainy conditions
- Sky textures looking weird
- Hills/mountains in distance with texture issues
- Performance issues, hitches, stuttering, jitter, etc.
- Always check dry and rainy conditions
- Shadows
Modding Performance Optimization
Overview:
- Tips for modders creating cars and tracks and how to optimize them for performance, mainly framerate and frametimes
Tips:
- Simplify 3D Model Complexity
- Goal: Reduce total polygon count while maintaining visual fidelity
- Use 3D model optimization software
- Eg. Blender and addons/extensions that simplify object complexity while maintaining visual intention
- Include Model Level of Detail (LODs)
- ie. High/Medium/Low.
- GTR2 will switch out the LOD based on distance, etc.
- Various GTR2 car/track files include LODIn and LODOut values
- LODIn = distance at which the object becomes visible
- LODOut = distance at which the object stops being visible
- Closer than LODIn = hidden
- Between LODIn and LODOut = visible
- Farther than LODOut = hidden
- Think of it as a visibility band or a visibility bubble around the camera
- Benchmark Shader Performance
- It's possible a particular shader is very heavy or poorly optimized
- Ensure Mipmapping (Texture LODs) Are Being Used
- Ensure mipmaps are available for textures
- Ensure mipmapping is actually working in-game
- Mipmaps are usually found as DDS files, usually in GTR archive files.
- Mipmaps are different sized images of the same textures. Usually around 6 versions.
- For example, a single texture might have the same image at multiple resolutions: 4096x4096, 2048x2048, 1024x1024, 512x512, 256x256, 128x128
- Simplify Collision Meshes
- Use low-polygon collission meshes, they don't need to be as accurate as the 3D model itself
- Use Static Objects When Possible
- If an object can't be interacted with then make it a static object
- Simplify Shadow Mesh
- GTR2 calculates shadows based on the car's mesh.
- Modders can optimize this by creating a specific, ultra-low-poly "Shadow Volume" mesh.
- If the engine tries to calculate shadows using the high-detail exterior bodywork, frametimes may fluctuate more as you pass under track lights or trees, due to the greater mesh complexity.
- Use Dynamic Shadows Only When Cast On Track or Pitlane
- The game must do extra work for dynamic every shadow that is cast
- If an object casts a shadow in a field, it should be a static shadow because no objects will be moving underneath it ie. a car
- Merge Objects
- Instead of hundreds of individual trees or guardrail sections, modders merge these into a single mesh. One large mesh with one material = 1 draw call.
- Example: Instead of 10 objects for trees at the edge of the track, it might be 1 object for 10 tree and that means 1 draw call
- Example: Instead of 2 objects for a two knobs on a car dash, it might be 1 object, so 1 draw call
- Texture Atlasing
- Instead of five 1024×1024 textures for different parts of a car dashboard, modders combine them into one 2048×2048 "atlas." This allows the engine to draw the entire dashboard in one pass without switching textures (which causes a "state change" that spikes frametimes).
- Example: A static garage wall might use one large texture as opposed to multiple textures say, for example, for a number of posters on the wall
ReShade MeshEdges Shader for Polgyon Approximation Visualization
- ReShade MeshEdges Shader Homepage
- "Here is a shader that derives the edges of a mesh from the depth-buffer. Might not work in every game, because depth-buffer access is needed. And I guess the the depth-buffer needs to be stored in a format with sufficient precision. Otherwise it looks weird." [23]
- For optimization purposes, MeshEdges could be used to visually identify polygon-dense areas that may be good potential candidates for optimization. It may also help with identify pop-in and pop-out.
- Note: MeshEdges doesn't show you actual polygons. It attempts to show a wireframe view 'guessed' based on edges and depth buffer info. This can be used as a very rough approximation of where to look for polygon density.
-
 gtr2-meshedges-shader.jpg
 -
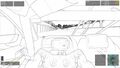 gtr2-meshedges-shader-2.jpg
 -
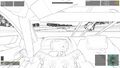 gtr2-meshedges-shader-3.jpg


Modding Cars
PassiveObsessive's Sounds
- Original Link Backup Link
- Thread last updated by PassiveObsessive2 on 2023-10-05, 3:23 pm (as of 2026-02-15)
- PassiveObsessives Sounds SHOPAK-260216.zip (2.5GB) - All downloads from the original thread as of 260216
- Folder of Individually Packaged PassiveObsesssive's Sounds - All downloads packaged individually as downloaded from the original thread as of 260216
- I have special permissions to link a single download zip of all sounds and to link an organized cloud folder of the downloadable sounds from the thread
- My hope is that I can help new users work with the car audio text files to fix sound issues or to replace sounds when a car mod doesn't come with them
Permissions: [24]
Permission:
Anyone is free to use these as they wish, you do not have to ask me for permission to use them. Use them in your mods, your downloads, whatever. However, I ask that you give me credit for the conversion and STRICTLY don't try to sell it for personal gain. Some newer sounds are completely my work, you'll find a different readme in those detailing how you can use them, if you wish to use those, please contact me.
Adding Rain on Windscreen
Post  Scotty 2014-11-18, 7:26 pm

Simple question really... if i have a car that doesn't show the raindrops on the windscreen when it's raining, anyone know how to add them? I figure it's something to do with the "...RAINSCREEN.GMT" file, obviously, but i have no idea where to start creating one and how it actually works.

Post  PATR10T 2014-11-19, 3:26 am

if you have no gmt for it you have to create one, copy the car windows, map them on the rainscreen texture, add the right material and add it on the cas
check a gtr2 standard car to see how it works ;-)

Post  Scotty 2014-11-19, 12:05 pm

Ok i understand generally what i have to do, thanks. The car i am trying to fix has the windscreen built into COCKPIT.GMT, if i want to remove it is that possible in 3DSE or do you need a modelling program to do it?

Post  PATR10T 2014-11-19, 12:35 pm

3dsimed Wink

Post  Scotty 2014-11-19, 1:12 pm

Ok i got it mostly figured out!

Last problem: in the rain only 2 HUGE drops show, right in front of the driver (not across the whole screen)... anyone know how i fix this or what is going on? The screen below isn't great but you can sort of see one drop and how big it is. The drops only appear in the red box area.

Post  PATR10T 2014-11-19, 2:38 pm

    PATR10T wrote:if you have no gmt for it you have to create one, copy the car windows,  map them on the rainscreen texture, add the right material and add it on the cas
    check a gtr2 standard car to see how it works ;-)

because you have to remap these windows to fit the rainscreen texture Wink

Post  Scotty 2014-11-19, 7:04 pm

I didn't quite understand what you meant the first time.

So do i use "Rescale Tex" in Material Edit for this? If so what the hell kinda values need to go in where?! Getting confused a bit now bsod

I'm really inexperienced in 3DSE and modelling (if it wasn't obvious haha) so i need precise help Wink  I have only really done skin stuff and physics before.
Notes:
- Yes, his last step needed texture scaling. See 3DSimEd#Scaling_and_Repositioning_Textures and related topics/keywords on the 3DSimEd page.
Giving Cars Rain Tires
Post  AquaAce0109 2020-04-20, 10:32 am

I have recently come across a problem with the AI in rain races. If the modded car has no rain tires and I run a race in the rain, the AI will pit every lap for wet tires that dont exist. Is there any way to make them run the race on the tires they have? Or is there a way to add rain tires for a mod to use.

Note: the mod im using is the GT Legends mod for GTR2. They dont have rain tyres, and they pit after every lap in the rain.

Post  mrleman 2020-04-20, 10:47 am

One of the easiest ways to fix that issue is to switch up your mod to the one of the default tire sets.

Open HDC file of your car mod. Find there following line TireBrand=XXX.tyr (XXX- should be the name of the tire file what your mod uses)
Replace XXX.tyr by Michelin_GT.tyr
Your edited line will look like TireBrand=Michelin_GT.tyr and save your HDC file.
After that tires will be changable by AI automatically depending from the weather conditions.
Simple Tire Modding
HypoToad:

This would probably work for other similar games as well.

I have found that you can alter the speed and cornering/handling of cars easily by changing two settings in the .tyr files in notepad. Here is a part of a .tyr file, notice the "Radius" and "Width" settings :

"[COMPOUND]
Name="Soft Compound"
FRONT:  // Arguments:ALL,FRONT,REAR,LEFT,RIGHT,FRONTLEFT, FRONTRIGHT,REARLEFT,REARRIGHT
DryLatLong=(1.800, 1.825)  // Lateral/longitudinal coefficients in dry weather
WetLatLong=(1.100, 1.100)  // Lateral/longitudinal coefficients in wet weather
[B]Radius=0.310  // Radius of tire[/B]
RadiusRPM=1.01e-6  // Increased radius per unit RPM
[B]Width=0.290  // Width of tire"[/B]

First the Radius the smaller the figure the slower the car will go and vice verse, if you want your car to go a little faster you can simply increase the Radius of the tire by a "small" amount, trial and error is the key.

Now the Width, this is where the handling changes come in, increase the amount from 0.290 to 0.320 and your car will have greatly increased grip on corners, but be aware if you increase it too much your car may tip over on corners, decrease it too much and you can turn it into a drift car.

It's trial and error, I changed the tires completely on an E-Type Jag and couldn't work out why the car would not go as fast and would tip over on corners, that's because the new tires had a smaller radius and were much wider, I changed the Radius to the previous tires settings and then the Width, I experimented with the grip until I had the right combination of grip and slip.

Back up your files first and remember you have front and back tires as well as different compounds in the same file.

Hope this helps.

-HypoToad

---

babis_xo:

1. "...if you want your car to go a little faster you can simply increase the Radius of the tire by a "small" amount..."

** While this is correct, it will affect in-game appearance, that is how the car is "sitting" on the ground. If you raise it, the car may appear like it's hovering over the ground. If you reduce it it may look like the tires are sinking in the ground.

2. "... the Width, this is where the handling changes come in, increase the amount from 0.290 to 0.320 and your car will have greatly increased grip on corners..."

** This one is totally wrong. Width has absolutely nothing to do with grip. It will affect nothing but the width of skidmarks.
Grip base is defined in:
DryLatLong=(a, b)  // (a)Lateral /(b)longitudinal coefficients in dry weather
WetLatLong=(a, b)  // (a)Lateral /(b)longitudinal coefficients in wet weather
Higher numbers mean higher grip.
Lateral is sideways grip @90 degrees.
Longitudinal is straight-line grip @0 degrees.
But as is always the case when cornering, forces are coming from angles all over between 0 and 90 degrees. So, grip at various angles, handling, sharpness, progressiveness or sudden loss of grip are defined with SlipCurves and a bunch of other settings under Compound tag (all of them explained in their own lines, after the // ).
To easily understand how these other settings work (even if you don't understand anything about these things), you need to compare a standard "vintage" tyre from GTLegends with a standard "modern" tyre of ~similar size from GTR2. Notice the key differences and work your way in the direction you need, depending the era and usage of tyre. It's easier than it looks.

-babis_xo
Fix Left-Right Reversed Mirrors
Make Cars Use The Same Showroom
[quote="Raybrig2"]I would like to make the same showroom for all cars. Can anyone tell me how to do this?[/quote]

Sure....

Find the models (.gmt) and textures used by the showroom you prefer and point each/all cars to use those models and textures.

To make it simple now and for future updates to the showroom, you can make a showroom.GTR file.

Place the wanted .gmts and textures inside this archive package and then inside the CAS of each car/group, at the top of the CAS include this showroom.gtr like we do for all .GTR files that a CAS references.

i.e
[color=#ff99ff]MASFile=Showroom.GTR[/color]
- or whatever you have named your mod's showroom.gtr file.

Put the Showroom.GTR at the top of the MASFILE= list to make sure no SAME named .gmts and texture files used by the 'other showrooms' get pulled from the other .gtr files as they will still exist in the mod unless you hunt them down and delete them.

Also make sure you then reference the showroom gmt file you wish to use in the CAS files. Maybe they are named differently for each car in their CAS so make sure you designate the one you want to use.

.ie
 [color=#ff99ff]<EXPO> MeshFile=[/color][b][color=#00ff00]Showroom.gmt [/color][/b][color=#ff99ff]CollTarget=False HATTarget=False ShadowReceiver=True LODIn=(0.0) LODOut=(80.0) Reflect=True[/color]
([i]Assuming that you named the showroom object as showroom.gmt of course[/i]).

If the showroom has more than one model then add in a similar fashion.
Of course these other models would also be in your showroom.gtr file.

This should give you a showroom that is used by all cars in your mod.

Good luck :)
Chrome Effect On Car Skin
Chrome in GTR2 is both easy and hard.

Easy because it is quite easy to implement, hard due to amount of additional work that need to be done if you want the chrome to work properly.

To get it to work you need 2 things:

1. On skin, everything that need to be chrome has to be painted grey. Exact grey shade need to be determined by trial and error in game but you want to use darker shades.
2. Car MUST use custom specular texture. Creating that texture is quite easy...

A. Open car template with skin for which you want to use chrome effect in PS.
B. Hide all layers except Base colour, Shadow and part(s) which should have chrome effect
C. Change base colour to light grey, not too bright, not too dark.
D. Change colour of part(s) which should have chrome effect to white
E. Save new specular texture with different name from one which is used in a mod.* **

* This is where things get difficult.

**You can actually save specular texture with same name as is one used in a mod and place that texture in a folder in which you have team which is supposed to use that texture and only that team will use that particular texture and have it's chrome effect while all other cars from that mod will use default texture.

Well, above statement is true util you decide to drive the car which have chrome effect and use that special specular texture. In that case all of a sudden all cars from that mod will use special specular texture and look strange. There is a fix for that problem but it require more work.

F. Create another instance of all objects which use same body material
G. Change body material name to something unique (WC_TEAM_BODY1_PA -> WC_TEAM_BODY1_PL will do the trick)
H. Set that new material to use your special specular texture with different name from original one

-Scorpyo
Car Collision Feelers

- Original Link
- I kind of just wanted to save this diagram for the future in case it came in handy
I remember a nogrip thread where this was discussed. The difference is made by feeler flags in hdc.

I saved this picture from that thread which shows what they represent:

By default when values are 0, AI cars think they have the same size of Lotus Elise or F550 (I don't remember which one was named).
When an AI car thinks to be smaller than what it really is, you have a "ram-prone" AI car.

To prove I'm right or wrong you should check the feelers of these cars.

-Wingnut
UndertrayXX and UndertrayParams in HDC files
gtr_73al:

Are they contact points at the bottom of the chassis or flat floor?

babis_xo:

They are contact points measured from center of the car, that is exactly half the distance between the two axles, elsewise, center of the imaginary wheelbase line and in the middle of car's width. Height of the contact points (middle number) is measured from the lowest point of your car, that is, your "reference plane"

gtr_73al:

Is it possible to remove them or the game will crash?

babis_xo:

Dunno. Remove them and see what happens.

gtr_73al:

In affirmative case, is it recommended?

babis_xo:

Definetely not. Cars do bottom out sometimes...

gtr_73al:

Is it required for all cars to have 12 undertrays?

babis_xo:

No.

gtr_73al:

About UndertrayParams, I'm guessing the last variable might have to do with the friction problem and the big speed loss. Is that correct?

babis_xo:

Correct. A flat floor fully protected, will have less friction

gtr_73al:

The first 2 variables are described in the comment line as "undertray spring rate, damper rate". That confuses me, is it related to the suspension.

babis_xo:

No. Measured in Newtons/meter, spring rate defines the force of the collision and damper the ability to absorb some of the "shock".

It's very easy to set the undertray points, even without using a 3d program. You will need:
- your PC
- a perfectly taken side photo of the car.
- the actual wheelbase of the car.
- a ruler with various scales on it

First, on your PC screen adjust the photo size so that the wheelbase matches a scale on that ruler (any of them).
Find the center between the two axles.
Measure each undertray point from that center in X-axis, and from the lowest point of your car in Z-axis.
i.e. Undertray00=(Y/width,  Z/height,  X/length)
*
*take into acount the ride height in .hdc, if you have set it lower than it actually is. Note that some parts of the mod hanging under the floor, may or may not affect your ride height in game and also, your "reference plane" for measuring undertray points in Z-axis.

-babis_xo
Beware long file names
    shovas wrote:

    Okay, I exported the side windows as hondansxgt3evo_cockpit_style1_hondansxgt3evo_intwd11.gmt

Be careful with using really long filenames in GTR2 as it does have a limit it seems.
One day you'll have a crash that you can't solve possibly for this reason.
Better to get into the habit of keeping them shorter and more concise.
GMT <NOTSPIN>, <DASHHIGH>, <XXX> Tags
    shovas wrote:

    By the way, what are <NOTSPIN> and <DASHHIGH> and all those <XXX>?

CAS  (Car ASsembly) Tags :

<TEAMDIR> = the folder of the .CAR file that called this .CAS file using Graphics=
<VEHDIR> = \Gamedata\teams

<NOTSPIN> = Don't appear in the Spinner.
<SPIN>  = Appear in the Spinner.
<EXPO> = Appear in the Showroom.
<DASHHIGH> = High detail in cockpit view.

Detail tags :
<MAX>
<HIGH>
<MED>
<LOW>

Corresponds to user selected, in-game detail.
A gmt with a detail tag will only display if the user has selected that detail level.

If a gmt has no tag, it appears everywhere - Spinner, Showroom and at any user selected detail level.
Modding Tracks
Vivid Sunrise and Sunset from GSCE Game Stock Car Extreme
for track lighting open track gdb
and copy this

Spoiler:

     SunriseAmbientColour = (92,86,77)
     SunriseDirectionalColour =  (120,59,0)

     DayAmbientColour = (132,132,140)
     DayDirectionalColour = (255,245,230)

     SunsetAmbientColour = (110,105,105)
     SunsetDirectionalColour = (154,60,0)


Scene Lighting base form GSC Extreme
it will give more orange tone in sunrise and sunset

-haruo
Convert rFactor Cars to GTR2
Try to extract all the GMTs et textures in the various .MAS files with the MAS extractor. I usually create a new folder for each .MAS file and give them the same name as the .MAS, it makes things easier. Open the .MAS with MAS.exe, select all the files, extract them to the corresponding folder. After that, import them all in 3DSimed and export them as GTR2...

If you don't have the MAS extractor :
https://www.mediafire.com/file/9ui6ez2j1328fq1/mas_203.zip/file
Modding Talent RCD Files
Consistency
Caution: I don't think this actually works. Needs confirmation.
- Set Consistency=0.0 in Talent RCD files to disable session-to-session dynamic driver ability variation (Unconfirmed 250821)
- If you run GTR2.exe with the trace=1000 argument, it will generate output about driver ability variation when loading into a session (Practice, Qualifying, Warmup, Race)
- Example:
- driver.cpp 628: Race Ability: 3.320217 CorneringAdd: 1.244892
- driver.cpp 628: Race Ability: 3.128439 CorneringAdd: 1.340781
- driver.cpp 628: Race Ability: 2.650000 CorneringAdd: 1.580000
- Example:
- Whether this variation is a good thing is probably subjective so it's good to know it can be toggled
- If you run GTR2.exe with the trace=1000 argument, it will generate output about driver ability variation when loading into a session (Practice, Qualifying, Warmup, Race)
Modding Championships
Multi-class Championship with Single-class Selectable Enforced
- tl;dr Include multiple classes in Game Filter but require single class with Selection Filter
- Originally a comment on Simwiki Discord
For those looking to create a multi class championship but forcing the player to only choose one category: the custom championship called Tuscan starlight does that. It only forces to choose tvr but I believe the same logic would work

more info, this is how the GDB looks like (at least what I believe does the trick):

// Game/Season Info: SIMULATION
Game Name = Tuscan Starlight Pro Trophy
Game Filter = AND: CC001
Selection Filter = AND: TVR
AI Filter =
(...)
SpecialClasses
{
  CC001
}
(...)
CategoryLists = 0
Category
{
  CC001 = MF1
}

So basically one could set two classes on Game Filter then easily define only one of the classes on the Selection Filter

-Angel A. F.
Modding DDS Textures with DXT Format Compression
- Texture formats including details on DXR format compression: https://www.fsdeveloper.com/wiki/index.php/Texture_formats_overview
Comments from TShirt on Simwiki Discord:
dxt1 --- no transparency
dxt3 --- has trspcy and image content is basic (shapes)
dxt5 --- has trspcy and image content is detailed
fsdeveloper.com on DXT types:
DXT1---tex with no trspcy at all
DXT3---tex with sharply contrasting translucent/opaque areas
DXT5---tex with soft gradients (on the alpha)
gtr2 needs the old DDS structure (and not the new DDS 10 or sth. header)

-TShirt https://discord.com/channels/1260036892703854652/1450916490562896116/1484234178009628723
Gotchas
Tire wear value requires a formula to represent an accurate percentage
- tl;dr Value needs to be reworked. Apply the following formula to the value from shared memory: tireWearMax=0.6875, tireWearRange=1.0-tireWearMax, tireWear=$prop('TyreWearFrontLeft')/100, tireWear=(tireWear- tireWearMax)/tireWearRange*100
- SimHub delivers this 0.0-1.0 value as a 0-100% value. This results in very slow tire wear when using in overlays.
- The fix is to apply formula as found in The Iron Wolf's open source CCGEP Monitor:
- const double TIRE_WEAR_MAX = 0.6875;
- const double TIRE_WEAR_RANGE = 1.0 - TIRE_WEAR_MAX;
- o.flWear = (float)((ev.mWheels[(int)GTR2WheelIndex.FrontLeft].mWear - TIRE_WEAR_MAX) / TIRE_WEAR_RANGE) * 100.0f;
- o.frWear = (float)((ev.mWheels[(int)GTR2WheelIndex.FrontRight].mWear - TIRE_WEAR_MAX) / TIRE_WEAR_RANGE) * 100.0f;
- o.rlWear = (float)((ev.mWheels[(int)GTR2WheelIndex.RearLeft].mWear - TIRE_WEAR_MAX) / TIRE_WEAR_RANGE) * 100.0f;
- o.rrWear = (float)((ev.mWheels[(int)GTR2WheelIndex.RearRight].mWear - TIRE_WEAR_MAX) / TIRE_WEAR_RANGE) * 100.0f;
Convert Tracks From Other Sims
Trivial Track Conversions
Trivial track conversions require only text edits and/or file renames, no special software or expertise required.
- BMW Challenge
- GT Legends
- GTR 1 (?)
- Race 07
Not So Trivial Track Conversions
Not so trivial track conversions may require special software or expertise, such as 3DSimEd, AIW editing, etc.
- rFactor 1
- RBR (?) [25]
Easily Convert GT Legends (GTL) Tracks to GTR2
From the Cascavel for GTL thread:
Change the skies_*****.GTL to GTR
Change MASFile=Teamap.GTL to MASFile=teamaps2.GTR (if it's there. It may not be)
add MASFile=Misc.gtr

And go to the Instance=skyboxi entry and replace it with one from a GTR2 trk file.

The only issue you may have is the position of the safety car. Sometimes they are in the middle of the track, and need to be placed in the pit lane.

-sunalp2
Fix GT Legends Converted Tracks That Don't Support Rain Clouds
- Edit the track's TRK file and copy&paste over a working GTR2 Instance=skyboxi{} section
Another great micro tutorial from Sunalp2 in this Remove skybox from track so it uses default skies? thread:
Remove skybox from track so it uses default skies? Empty Re: Remove skybox from track so it uses default skies?

Post  sunalp2 Yesterday at 5:10
I just downloaded the track and had a look, The skyboxi instance is a GTL one, it doesn't have the rain entries.

Copy and paste a GTR2 skyboxi entry in the trk file like I mentioned in the Cascavel thread on Evolution.

Here's one I prepared earlier. yes, yes

Instance=skyboxi
{
 Moveable=True
 MeshFile=skyboxi.gmt CollTarget=False HATTarget=False
 Instance=day
 {
   Moveable=True
   MeshFile=day.gmt CollTarget=False HATTarget=False
 }
 Instance=night
 {
   Moveable=True
   MeshFile=night.gmt CollTarget=False HATTarget=False
 }
 Instance=sunrise
 {
   Moveable=True
   MeshFile=sunrise.gmt CollTarget=False HATTarget=False
 }
 Instance=sunset
 {
   Moveable=True
   MeshFile=sunset.gmt CollTarget=False HATTarget=False
 }
 Instance=sun
 {
   Moveable=True VisGroups=(32)
   MeshFile=sun.gmt CollTarget=False HATTarget=False
 }
 Instance=moon
 {
   Moveable=True VisGroups=(32)
   MeshFile=moon.gmt CollTarget=False HATTarget=False
 }
 Instance=dayR
 {
   Moveable=True
   MeshFile=dayR.gmt CollTarget=False HATTarget=False
 }
 Instance=nightR
 {
   Moveable=True
   MeshFile=nightR.gmt CollTarget=False HATTarget=False
 }
 Instance=sunriseR
 {
   Moveable=True
   MeshFile=sunriseR.gmt CollTarget=False HATTarget=False
 }
 Instance=sunsetR
 {
   Moveable=True
   MeshFile=sunsetR.gmt CollTarget=False HATTarget=False
 }
}

See all the entries that end in r? That's for the rain.

-sunalp2
Easily Convert BMW M3 Challenge Tracks to GTR2
Notes:
- BMW M3 Challenge (Original 2007 Promotional Game)
- Follow #Easily Convert GT Legends (GTL) Tracks to GTR2 until I have specifics completed
- BMW M3 Challenge tracks almost certainly come from GTR2 or GT Legends tracks
- But there may come a time when all you have access to is the BMW M3 Challenge track and want to port it back.
- This was my case when I found some hard to find tracks all in one space on the Classic Motorsport Hub download pages
Steps:
- Rename *.BMW to *.GTR
- Edit TRK file:
- Rename *.BMW to *.GTR IN MASFILE=xxx lines
- Change MASFile=Teamap.GTL to MASFile=teamaps2.GTR (if present)
- Add MASFile=Misc.gtr (if not present)
- Fix Instance=skyboxi for full GTR2 skybox day/night + dry/rain support:
- See #Fix GT Legends Converted Tracks That Don't Support Rain Clouds for how to replace Instance=skyboxi{} block
Easily Convert Race 07 Tracks to GTR2
According to Scorpyo [26]:
- Copy track folder into GTR2 Tracks folder
- Make a copy of shared folder in original game and rename it shared_whatever
- Open trk file with notepad, locate line that shows to shared folder and changed "shared" to "shared_whatever"
GTR Evo should be the same
According to Eurostc [27] [28]:
I havn't done them in a few years but they were quite similar and only took a few minutes.....below are a few quotes from a few sources

"""'Well they are so similar that it hardly requires much conversion.
Just check out a track that is both in GTr2 and Race 07 and compare them.
Like Monza or Brno.
And if you got a tutorial how to convert Gtr2 to race 07 already then the stuff is already mentioned.
You do not even need to convert the gmt's in 3Dsimed to get the tracks running in Gtr2.
Just a little time and a text editor.
Unless it is an original Race 07 track where you do need to change some shader settings."""""""

""""""If you Google mojo66 and race 07 modding you will find a little more info""""
Convert rFactor 1 Tracks to GTR2/GTL
How SearchPath Settings Work
- SearchPath settings, eg. in .CAS files, define absolute or GTR2-root-folder relative folders in which GTR2 looks for files referenced in other settings. For example, it might look in these folders for files like .GTR, .GMT, .DDS, .BMP, etc.
- Search Order:
- Top to bottom
- The first file found will be used
- Order Importance:
- If there might be files of the same name, either in .GTR archives or as loose files, then order becomes important
- Order SearchPath settings in priority sequence, the first file found will be used
- Later/lower SearchPath settings will not be used if a file is already found from a higher up SearchPath setting
Notes:
- <TEAMDIR> = .CAR folder eg. GameData\Teams\24H\BMW M3GTR Teams\BMW Motorsport\
- <VEHDIR> = GameData\Teams\
Tips:
- Order SearchPath settings by most immediate relevance first
- This helps ensure you can override common, shared files from common folders like GameData\Teams\ from more immediately relevant folders like GameData\Teams\<TEAM> and GameData\Teams\<TEAM>\<CAR>\ folders
- This becomes critical when overriding files in, for example, .GTR files where there are two .GTR files: one in the team folder and one in the car folder that overrides the team version. You must list SearchPath settings in the right priority sequence to load the intendended file in order to load it from the first .GTR file found.
Gotchas:
- If there might be files of the same name, either in .GTR archives or as loose files, then order becomes important
- For example, there were some files in a parent directory I wanted to search but SearchPath=<VEHDIR> was overriding the files I really wanted in folders just above <TEAMDIR>
- Original that didn't work:
- SearchPath=<TEAMDIR>..\
- SearchPath=<TEAMDIR>
- SearchPath=<VEHDIR>
- Instead of adding search paths on the bottom, I had to add them grouped like this:
- SearchPath=<TEAMDIR>..\
- SearchPath=<TEAMDIR>
- SearchPath=<TEAMDIR>..\..\
- SearchPath=<TEAMDIR>..\..\..\
- SearchPath=<VEHDIR>
- Additionally, adding search paths on the top might not be ideal, either, because you may be telling GTR2 to search for files in far away folders first.
- Not optimal:
- SearchPath=<TEAMDIR>..\..\..\
- SearchPath=<TEAMDIR>..\..\
- SearchPath=<TEAMDIR>..\
- SearchPath=<TEAMDIR>
- Better:
- SearchPath=<TEAMDIR>..\
- SearchPath=<TEAMDIR>
- SearchPath=<TEAMDIR>..\..\
- SearchPath=<TEAMDIR>..\..\..\
- SearchPath=<VEHDIR>
- Why: Because this list is most likely in the most relevant order
- The first folder is probably GameData\Teams\<TEAM>\ folder with the files that are shared by all cars in the GameData\Teams\<TEAM>\<CAR>\ folder
- The second folder is the car's folder that can compliment files found in the team folder
- Anything above these folders eg. GameData\Teams\ is a shared folder that you probably want GTR2 to search after your primary team and car files
- This helps ensure you can reliably override files GameData\Teams\ files with your own files in the more immediately relevant team and car folders
- This becomes critical when overriding files in, for example, .GTR files where there are two .GTR files: one in the team folder and one in the car folder that overrides the team version. You must list SearchPath settings in the right priority sequence to load the intendended file in order to load it from the first .GTR file found.
- Original that didn't work:
- For example, there were some files in a parent directory I wanted to search but SearchPath=<VEHDIR> was overriding the files I really wanted in folders just above <TEAMDIR>
How Tag Filters and Classes Tags Work
These are the Game Filter, Selection Filter, and AI Filters you can find in some GDB files and Classes tags you can find in CAR files.
- Tag Filters
- Example: OR: Gr2 AND: PG1958, PG1959, PG1960, PG1961
- Boolean Operators:
- Implicit AND for both space-separated clauses and comma-separated lists
- AND Boolean Operator
- Follow with a comma-separated list
- Follow list with a space to start a new boolean clause
- OR Boolean Operator
- Follow with a comma-separated list
- Follow list with a space to start a new boolean clause
- AND-OR Cases:
- OR: A B
- Either A or B must be present
- OR: A, B
- Either A or B must be present
- AND: A B
- Both A and B must be present
- AND: A, B
- Both A and B must be present
- AND: A OR: C, D, E, F
- A must be present and either C, D, E, or F must be present
- AND: A AND: C, D, E, F
- A must be present and C, D, E, and F must be present
- OR: A B
- NOT Boolean Operator
- A NOT: B
- A must be present and B must NOT be present
- It is not recommended to get very complicated with AND and OR clauses in combination with NOT as there appears to be no known precedence operators for filters and tags like math has
- A NOT: B
- Classes Tags
- Example: classes=”TC60, Jgr_MKI_34, Gr2, PG1958, BSCC1961″
- Comma separated
- Alphanumeric and underscore (a-z, A-Z, 0-9, _)
- Limitations
- AND: A, B OR: C, D, E, F
- Does not work. Seems to translate to A or C,D,E,F OR B or C,D,E,F in other words just brings in everything.
- AND: A AND: B OR: C, D, E, F
- Does not work. Nothing is matched.
- AND: A, B OR: C, D, E, F
- Tips
- Use fixed-length tags to avoid partial matching
- As described below, a tag like "ABC" will also match "ABCDEF", "ABC_DEF", "ABC123", etc. as long as the "ABC" prefix is there it will match
- The fix is to ensure your car set uses fix-length tags that force you to be specific
- Ex. ESR_BMW_M3GTR_RC and ESR_BMW_M3GTR_SC where RC is Race Car and SC is Safety Car
- Use fixed-length tags to avoid partial matching
- Gotchas
- Partial Matching
- Filters like "ABC" will match any tag with the prefix "ABC", so these match: "ABC1", "ABC_2", "ABCDEF", etc.
- Fix: Use fixed-length tags that force you to be specific. Eg. ESR_BMW_M3GTR_RACE and ESR_BMW_M3GTR_SAFE where RACE is for race cars and SAFE is for the safety car
- Cause: It just seems to be prefix matching, nothing about numbers, underscores, or anything else being special or not handled very well
- Partial Matching
Files You Can Edit While The Game Is Running
Unless otherwise specified, assumes you're at the main menu: Game will load files on-demand, such as when going out on track, which is what makes this work.
- UserData
- PLR: No
- Locations
- GDB: No
- Teams (CAR Files)
- Unknown
- Talent (RCD Files)
- Unknown
Files You Can Edit To Change A Saved Session
The idea here is finding files that can be edited and change a saved session, that is, the data is not saved by GTR2 but re-read from the original files.
- Locations
- AIW: No, at least for race performance params such as RaceRatio (Confirmed 250717)
Modify or Remove Track Textures and Images eg. Billboards
Context: Some mod tracks come with adult themed billboards. I wanted to remove these.
Overview:
- Find the DDS image: Might be a loose file or packed in a GTR archive
- Replace the DDS: Replace the file with a new DDS image or move it out of the way and copy+rename an existing DDS over its name
Steps:
- Find the offending DDS image file in the GameData\Locations folder
- Ex. Inside a GTR archive: GameData\Locations\BeranovacGTR22\BeranovacGTR22map.GTR
- If you can't find it, it's almost certainly packaged in a GTR archive which you need to extract
- Extract GTR archives with Geditor (most users) or 3DSimEd for advanced users (video demonstration)
- Replace the DDS image
- Replace with a new DDS image or rename an existing DDS file over it
- If you had to extract from a GTR archive:
- You can repack the GTR archive with Geditor if you know how
- Or, you can move/rename the GTR archive out of the way by changing its extension to anything else and leaving all the extracted files in the GameData\Locations\<LOCATION>\ track folder
- Comment out TRK file MASFile parameter referencing the GTR archive you moved/renamed out of the way
- Add TRK file SearchPath param if you extracted the GTR archive contents into a subfolder of the GameData\Locations\<LOCATION>\ track folder
- Ex. GameData\Locations\BeranovacGTR22\BeranovacGTR22mapGTR
Gotchas:
- Extract the GTR archive to a subfolder to stay organized
- Move/Rename the GTR archive out of the way
- Comment out TRK file MASFile param
- Add TRK file SearchPath param pointing to the subfolder
Racing
How to Practice, Qualify, and Race against AI
Overview
- Practice until you are race ready
- Qualify with a fast setup until you find competitive AI difficulty level
- Race with a race setup or BOP yourself if you're too fast (extra fuel, hard tires, extra drag, etc.)
General Tips:
- Start at 100% AI: Always start new class/car/track combos at 100% and tune from there. Or, if you're confident you're in a different range, start from there.
- Treat AI Like Real People: Don't take chances with the AI you wouldn't take with a human. This will enhance your experience, improve immersion, and stop you from 'gaming' the race by abusing AI short-comings
Practice:
- Get Race Ready: Run laps until you're at race-level comfort with the track (ie. run multiple, qualifying-speed, incident-free laps). If you end up going much faster in the race, because you're still learning and getting significantly faster, you won't get a competitive, close, hard racing AI experience.
- Scout the AI: Keep an eye on AI laptimes. Restart the event and adjust the AI level as needed.
Qualifying:
- Run a Fast Qualifying Setup: Run Soft Tyres and 4-6 laps of fuel as a minimum qualifying setup. You can tune whatever else makes you fast. In the race, you'll be on a slower setup and this will result in AI performance which, relative to you, provides increase competitiveness.
- If you don't do this, and you qualify on a stock setup, for example, you will find qualifying seems to go fine but in the race you will probably outperform the AI by a wide margin. I'm not exactly sure why this is. Maybe AI are switching to a slower race setup which is why when you also switch to a slower race setup it evens out their relative competitiveness compared to you.
- Wait for Optimal Track Conditions: Go ahead and qualify immediately but be aware the track will not be warmed up or as rubbered in as it will be later in qualifying. You can often achieve better laptimes later in qualifying. Use time acceleration to go to 10-20 minutes left in qualifying and you'll have a well warmed up track that is rubbered in and now you'll be able to achieve better laptimes.
- Save Time Finding a Good AI Level: If you're too fast or too slow (ie. not the position you want to be) then note your time and run qualifying again with a different AI level using time acceleration. Compare your time against the AI and see if your time would lie where you like to qualify. Change the AI level if you're unsatisfied and repeat. You don't have to actually put in qualifying laps until you see you're at the right AI level.
- Don't Skip the Session: Time Accelerate Instead: Do not skip the session, use time acceleration, instead, to ensure all AI get a time in. Failure to do this may result in random grid positions because some AI have not got a qualifying time in.
- AI Level Increments And Their Rough Effect On AI Laptimes:
- 80-90: 0.5sec increments
- 90-100: 0.25sec increments
- 100-110: 0.2sec increments
- 110-120: 0.1sec increments
Race:
- Run a Normal-ish Race Setup: Run Medium Tyes (at least don't run Soft Tyres) and carry a normal amount of fuel. This will help slow you down and even out your competitiveness relative to the AI.
- Fuel: 1 Formation Lap + N Race Laps + 1 Flag Lap + 1 Extra (just in case)
- If you qualified 1st, carry double fuel to give the AI an advantage so you hopefully don't run away with the race
- Tyres: Mediums or Hard Wets
- If you qualified 1st, run Hard Tyres to give the AI an advantage so you hopefully don't run away with the race
- Fuel: 1 Formation Lap + N Race Laps + 1 Flag Lap + 1 Extra (just in case)
- Wait For Green: Jumping the Green Flag is easy and can get you an unfair advantage. Wait for it and you should accelerate realistically with the AI instead of getting ahead of them.
- Don't Pass Early: Do not try to pass too many people on the first corner or first lap. The AI is wonky and gets jammed up on the first lap when everybody is all together so do yourself a favour and work with it. You'll be in the correct position, AI competitiveness-wise, after the first few corners or maybe the first lap, and you'll have a much better race.
- Personally, I find it necessary not to pass at all the first lap, just maintain the position, to avoid 'gaming' the race and moving up too quickly
How to BOP yourself when you're too fast and don't want to qualify again
- Proceed to the race and try these tips
- The easiest and most effective thing to do is to go a step down in tires: If the grid is on Mediums, go Hards. If the Grid is on Hard Wets, go Intermediates.
- This is the easiest thing to do but will likely cost you some places that other BOP methods might help you get.
- Add extra fuel to weigh yourself down
- Roughly 10L of fuel can slow you down 0.1s-0.2s per lap depending on various factors
- Effect stronger on corner-heavy tracks
- Effect stronger on lighter cars
- So add an extra 30-60L to slow yourself down by 1sec
- Roughly 10L of fuel can slow you down 0.1s-0.2s per lap depending on various factors
- Drive on slower tires
- Hards vs Mediums
- Increase Wing Drag
- Modify Gear Ratio to Decrease Top Speed and/or Acceleration
Tips:
- Find Your AI Level More Quickly:
- Instead of trying AI levels one by one, or in large jumps, jump by doubles and cut by halves to accelerate the process (ie. a bisection search, ex. 1..2..4..8..6..5)
- You could start with an increment of 1, but you could also try 5 or 10, and proceed to bisection search from there (ex. 100, 110, 105, 108, 106, 107)
- Start off at 100 AI Difficulty or, if you're confident of your skill level, the AI level of your choice
- Set a qualifying time, then
- Time accelerate to see AI laptimes
- If you want them faster or slower, restart the qualifying session with the AI adjusted by 1
- Time accelerate again and watch AI laptimes, if you want to adjust again, double your previous adjustment (ie. 1, 2, 4, 8)
- You don't need to set another laptime here unless you're happy with the AI level and want to
- If you find an adjustment was too big, repeat and cut the previous adjustment by half
- Instead of trying AI levels one by one, or in large jumps, jump by doubles and cut by halves to accelerate the process (ie. a bisection search, ex. 1..2..4..8..6..5)
Car Setups
- GTR2 Car Setup Guide (PDF)
- GTR2 Car Setup Guide (Excel XLS Spreadsheet)
- Old NoGrip comment about how to approach tuning setups
Pitstops
Controls:
- Assign controls: Pit menu controls are not assigned by default
- Controls:
- 7: Request Pit Position
- 8: Request Pit Status
- 9: Request Pit Stop
- Up/Down: Pit menu up and down (ie. select options)
- Left/Right: Pit menu increase and decrease value
- Enter: Confirm pit menu selections and proceed with pitstop
Gotchas:
- Pitstops (with the pitstop menu) are automatic in a race but not in other sessions
- You must request a pitstop manually to get the pitstop menu in a non-race session
Tips:
- SimHub Keyboard Emulation from Controller Inputs
- Simhub can accept controller input and emulate keyboard input
- I use this to map things like pit menu up/down/left/right to a joystick on my wheel and pit limiter to a button on my wheel among other things
Known Issues:
- Pit menu locks up unless Menu Select, Menu Up/Down, and Menu Val. Increase/Decrease are assigned
Custom Daylight Acceleration
Edit your UserData PLR file and change the Time Scale Factor parameter to any value between 1 and 600 where 1 is real-time and >1 accelerates time.
For example, I chose Time Scale Factor=”24″ to experience a full day-night cycle in a 1 hour race.
More recently, I’ve been using Time Scale Factor=”12″ to experience half a day-night cycle in a 1 hour race. I chose this to have some daylight transition but not too much in my usual 20min races.
Note! 24 Hour races do not use Time Scale Factor. You can set a race length when setting up a 24 Hour race and GTR2 will automatically set the time scale. For example, you can setup a 24 Hour race with a 1 hour race length and you will still experience a 24 hour day-night cycle.
Hint: Find your GTR2 folder and you’ll see your UserData\Player\Player.PLR file. Edit this file. Mine is “G:\SteamLibrary\steamapps\common\GTR 2 – FIA GT Racing Game\UserData\Shovas\Shovas.PLR” but your location and PLR folder and file name will be different.
GTR2 Rainfall and Auto-selected Tyres
Originally a post on Race Department.
Session: Simulation, Race, Donington Park GP 2004
Rainfall, Track, Ambient, Conditions, Forecast, Tyres Auto-selected
- None: 20C Dry, 20C, Sunny, Sunny, Medium
- 10%: 20C Damp, 20C, Cloudy w/Rain, Cloudy w/Rain, Medium
- 20%: 20C Damp, 20C, Cloudy w/Rain, Cloudy w/Rain, Intermediate
- 30%: 20C Damp, 20C, Cloudy w/Rain, Cloudy w/Rain, Intermediate
- 40%: 20C Wet, 20C, Cloudy w/Rain, Cloudy w/Rain, Hard Wet
- 50%: 20C Wet, 20C, Cloudy w/Rain, Cloudy w/Rain, Hard Wet
- 60%: 20C Wet, 20C, Cloudy w/Rain, Cloudy w/Rain, Hard Wet
- 70%: 20C Wet, 20C, Cloudy w/Rain, Cloudy w/Rain, Hard Wet
- 80%: 20C Flooded, 20C, Cloudy w/Thunderstorm, Cloudy w/Thunderstorm, Soft Wet
- 90%: 20C Flooded, 20C, Cloudy w/Thunderstorm, Cloudy w/Thunderstorm, Soft Wet
- 100%: 20C Flooded, 20C, Cloudy w/Thunderstorm, Cloudy w/Thunderstorm, Soft Wet
- Changeable: 22C Damp, 19C, Cloudy w/Rain, Cloudy w/Rain, Medium
Changeable Rain
Changeable seems to bias rainfall towards Track’s GDB Average Rain parameter. In other words, a track like Donington or Spa may have more sessions with rain than Dubai or Valencia.
This seems to apply for Temperature as well where Dubai will be routinely much hotter than Donington although this does not seem to be an editable file but baked into the track so you’d need an editor to change this, I guess(?).
Beware: that Changeable Rainfall is pretty boring and broken in GTR2. You should really consider The Crew Chief GTR2 Enhancements Plugin with Real Weather for a much improved dry and wet weather experience.
Picking the Right Tyres for the Current Conditions and Forecast
Based on the Conditions and Forecast icons and the Track Wetness in the garage:
- Sunny/Sunny
- Dry: Mediums
- Damp: Intermediates -> Mediums
- Wet: Hard Wets -> Intermediates
- Flooded: Soft Wets -> Hard Wets
- Rain/Sunny
- Dry: Mediums
- Damp: Intermediates -> Mediums
- Wet: Hard Wets -> Intermediates
- Flooded: Soft Wets -> Hard Wets
- Rain/Rain
- Dry: Intermediates -> Hard Wets
- Damp: Hard Wets
- Wet: Hard Wets
- Flooded: Soft Wets -> Hard Wets
- Rain/Storm
- Dry: Hard Wets -> Soft Wets
- Damp: Hard Wets -> Soft Wets
- Wet: Hard Wets -> Soft Wets
- Flooded: Soft Wets
- Storm/Rain
- Dry: Soft Wets -> Hard Wets
- Damp: Soft Wets -> Hard Wets
- Wet: Soft Wets -> Hard Wets
- Flooded: Soft Wets -> Hard Wets
When to change tires during a race based on road conditions
- Don't know when you should be pitting for new tires?
- Try Crew Chief
- Listen for when it starts calling opponents going into the pits to change tires
- The Crew Chief will also identify what tires AI are moving to
- Try Tyre Stats Overlays
- See SHO XD Style SimHub Overlays or XD overlays here: #Custom_HUD_Overlays
- Watch your tire temps, if you can't keep it within 80-100C, and especially if it's consistently approaching or exceeding 120C, it's time to change
Lessen Brake Lock-up by Adjusting Brake Pressure
- Adjust Brake Pressure in the Garage Setup screen to alleviate brakes that are locking up too easily
- This includes when brakes lock up even under very little physical pressure being put on your brake pedal
- Even a few percentage points adjustment for Brake Pressure has a significant effect you will feel. You might need to adjust up to 5% or even 10%.
- I found I was thinking of Brake Bias to resolve this issue but I should've been thinking Brake Pressure
Arcade Mode
Preliminary notes trying to figure out how deep arcade mode is
What is this?
- This one of the modes along with Novice, Experienced, Pro, and Simulation modes
- I'm not exactly sure what the complete changes to Arcade mode is. Does it include extra fake grip or just enables the assists you can already see in-game? I don't know.
What others have said:
- "Arcade mode- with individual physics to suit every game fan."
- "In addition to the most accurate racing simulation on the planet, GTR has a completely separate Arcade mode for those gamers who love to throw the car around with wild abandon. The arcade mode is all about fun with thumping music and forgiving handling - a perfect introduction to real racing for the average gamer."
- https://worthplaying.com/article/2004/9/11/news/19162-gtr-the-ultimate-racing-game-xboxpc-screens/
Arcade Mode:
- Changes mirrors to virtual rearview mirror only
- Anything else??
- Is this for controllers and gamepads?
Questions:
- Does this simplify physics and handling? Add extra grip? Eliminate fuel usage or tire wear? etc., etc.
Misc:
- In Race 07, there's an Arcade mode where the cars have very obvious extra horsepower and grip, but I don't know if that's what's happening here.
Online Multiplayer
Online multiplayer is very rare these days but some people still give it a go.
The German Beer Booths Online Leagues
There's a small network of sites themed after 'bierbudes' (beer booths) that appear to still be running regular league races for GTR2, GTR2 Power & Glory, and GT Legends. They are German and so timezones may make it difficult to participate for some.
Bonus: These sites have incredible download repositories with mods that are packaged at a high polish level.
Consider donating to help them out as site registration and downloads are free.
- Pilsbierbude ("Pilsner Beer Booth") - GTR2
- Koelschbierbude ("Koelsch Beer Booth") - GTR2
- Festbierbude ("Festival Beer Booth") - GTR2 Power & Glory
- Altbierbude ("Alternative Beer Booth") - GT Legends
Weather
GTR2 Weather
- GTR2 Weather - Creating custom weather files or using Real Weather powered by the Crew Chief GTR2 Enhancements Plugin
rFactor RFE Plugin Helpful Weather Details
- The rFactor RFE Plugin implements weather enhancements for rFactor 1 and provides some helpful details for GTR2 as many details are the same because of the shared isiMotor engine
Valuable tables of weather labels, conditions, and pathwetness values:

Guides
GTR2 Standalone Folders (Drops)
- GTR2 Standalone Folders - Highly recommended strategy to copy&paste GTR2 folders that each have a specific role
GTR2 and Downsampling with NVIDIA DSR
Simple Power & Glory Install
Remove Unwanted Car and FFB Bumps and Bounces in GTR2
How to make GTR2 Championships
Challenging little tire wear experiment with tire wear acceleration
Hidden Special Classes Make for Good Single Class Racing
How much FFB can you feel in GTR2? 1/1000th of a percent
Sim Racing Replay Video Editing
Optimizing Shadows
- Optimizing Shadows in GTR2 - Thread with details about working with shadows in GTR2
Dialing In AI Difficulty For Starting From The Rear
Tuning AI Parameters That Influence AI Performance
How To Place Yourself On The Grid For Different Experience Scenarios
Make the same showroom for all cars
Trivia
Did You Know?
GTR2 is deeper than you might think: This is a section for trivia about the things you might not know even if you’ve been using GTR2 for a long time.
Safety car comes out based on accident severity
- I'm assuming the FCY is evaluated by accident severity and the SC always comes out for FCY
it is triggered by evaluated accident severity.  Threshold is configurable in .plr file.  Some tracks have issues around SC, one issue is where xfinish object does not match .aiw s/f point.  But on most tracks you will see SC in front of the grid after everyone catches up.

-The Iron Wolf on Simwiki Discord https://discord.com/channels/1260036892703854652/1269815958072201216/1494341550153531493
Modern GT Classes vs 2003-2004 GT Classes
- GT ~ GT2: High-performance, extensively modified GT cars
- N-GT ~ GT3: Production-based GT cars with Balance of Performance
- G2/G3 ~ GT4/Cup: Entry-level and regional/national GT competitions
This was from ChatGPT and it sounds about right but take it with a grain of salt
Setting Changeable Rainfall Enables More Realistic Weather
- Requires Crew Chief GTR2 Enhancements Plugin
- Setting Rainfall to None will use a clear, sunny day and the temperature will progress from 20C to 30C every session, every race, every time. Set Rainfall to Changeable to enable more realistic weather based on the location. Eg. Overcast at Donington, Sunny at Barcelona, etc. These are based on weather probabilities for the geographic location of the track.
GTR2 Introduced LiveTrack Technology
- Ambient temperatures affect track temperatures
- Dynamic rubbering-in as cars drive around the track
- Marbles accumulate outside the ideal racing lines, showing visually, affecting tire physics, and felt through the wheel by force feedback
- Rain affects track surface grip
- Rain floods surface gradually decreasing grip (reflections increase with rain levels)
- There are two main lines, dry and wet, and under wet conditions the wet line dries much more slowly than the dry line due to all the traffic on the dry line
- Wet tracks dry out as rain ends
Unconfirmed:
- Under wet conditions the wet line becomes preferable with wet tires
- LiveTrack only works on original tracks, not add-on tracks [29]
- Rain may pour on some parts of the circuit and not others [30] via [31]
- Rain "washes down the surface" [32]
- Heavily used parts of the circuit may dry out first [33] [34]
- 2024-11-15: I think something like this is happening. At Velopark, on the back straight, after rain and while drying out, I can see some stretches of the straight have no rain spray while other parts do, indicating some segments are drying out faster than others, I guess.
Comment provides additional clarity [35]:
- GTR2 weather system is heavily inspired by F1 Challenge weather
- But with the additions of marbles and reflection (maybe even have unused wind simulation like rfactor)
- About "LiveTrack", only in official tracks and it's related to material naming.
- You have to adjust each addon track with proper material that original tracks used.
- I think would be related to modify the track in blender or in 3dsimed.
- About heavily used parts of track drying first, it's a little complicated because it's related to temperature, number of amount of cars on track, and hard-wired parameters.
- The 'onpath' aka dry line will always dry first and then the off-path line dries more slowly
- About parts of the track receiving rain and other not: Unlikely. The rain comes in all at once at the same rate.
- But due to weather variations from minute to minute, you may feel that some parts rain less and other more
GTR2 suports 180hz+ FFB refresh rate
- GTR2’s FFB update loop is tied to your frame rate. So, the more FPS you get the more refined your FFB experience will be. Disable vsync to start. Then, allow GTR2 to use all CPU cores by using the free Bill’s Process Manager or nagware Process Lasso (I ended up purchasing this and can recommend). If you’re still not satisfied, SHO Competition FFB provides crowdsourced FFB profiles for many wheels and reviewers say it really brings GTR2 FFB to life.
GTR2 has fully animated feet
- The right foot moves in and out on the gas pedal as you would expect. The left foot brakes but it will also move over to the clutch and go in and out there. Here’s one I didn’t expect, when slowing down for a corner the right foot moves over to the brake pedal while the left foot stays on the clutch…for heel and toe I guess?
GTR2 can use external sounds in the cockpit
- External sounds often sound better to me than the muffled normal cockpit sounds. Edit your PLR and set: Only External Engine Sounds=”1″ // Always use external engine sounds regardless of current view
GTR2 is hard-wired to 240 degrees ffb wheel rotation
- So unless you have a 240deg physical wheel the in-game animation won’t match your physical wheel. Find out why you might want to consider setting your wheel to 240deg besides getting matching animation over on this Race Department post.
When selecting opponents and the number turns red, it means the game has run out of unique cars and it will start duplicating cars
- You normally have enough cars that you’ll still get a good race. The only situation might be in cases like the BMW M3 GTR where you only have two unique cars, and so only two unique AI, which means there might not be enough variety in the field to have a realistic feeling race.
Stick Shift Animation Very Closely Matches Your Real Hand Movement
- With "Hold Button To Shift" enabled, shifting out of a gear triggers the animation in-game which causes the animation to trigger quickly enough that it's close enough to your hand movements to look nearly instant
- Previously, I had a Logitech G27 shifter where I could not reliably use "Hold Button To Shift" due tro unreliable electrical contacts
- But, I recently upgraded to a Thrustmaster TH8S and I can now use the "Hold Button To Shift" option
- Because the game now knows when I shift "out of gear" and not just "into gear" the animation triggers very quickly, much more quickly than I'm used to
- All that makes it appear more 1:1 with your real-life movements, just as you expect the wheel animation to rotate 1:1 with your real-life wheel
- And GTR2 is smart enough not to double-up the shift animation too for when you shift out of gear and then into a new gear. Nice.
- It really helps with immersion
SimBin's 2006 Weather and Lighting Preview Screenshots
The latest progress in the development of the weather system is depicted. Long jets of water, spectacular reflections on wet tarmac and an upgraded “Live Track Technology” with different self-drying track sections create a realistic race feeling in GTR 2 even with bad weather. Darkness also has its charms, the impressive play of light of the dynamic day and night change even makes long distance races a thrill.
Source: SIMBIN Screenshots Preview GTR 2 Weather and Lighting Effects (April 2006)


Quick Tips
These are quick tips that can be said in simple ways. More involved tips can be found in the Tips and Tricks section.
Click Timing Driver To Change Camera
Clicking a driver's name on the Timing screen will also change the camera to that driver's car on the Grid screen.
Faster Time Acceleration
In the garage in a race session, time acceleration will go faster on the Timing screen. So, if you’re trying to time accelerate to see AI lap times and/or rubber in the track, try using the Timing screen instead of the cockpit feed screen.
Timing Screen Laptimes Details
In the garage in the Timing tab, right-clicking on a driver will show their individual laptime details.
Choose Your Own Starting Position
Unselecting all qualifying sessions, when setting up a race, will enable the Grid Position selector so you can manually select where you want to be on the grid.
Disable Ghost in Time Trial
Zero out Ghost Max Alpha Value in UserData\User\User.PLR:
Ghost min alpha distance="0.50000"
Ghost max alpha distance="50.00000"
Ghost min alpha value="0.00000"
Ghost max alpha value="0.00000"
May not work for some cars / mod cars(?)
Tips and Tricks
Perfect Mirrors
This is as close to perfect mirrors in GTR2 as I've ever found.
This will provide high resolution, enhanced level of detail compared to normal mirrors, an aspect ratio that looks decent and works on most cars (even mod cars), and fixes certain buggy behaviour with 'self-in-mirror' body parts, etc.
- Mirror BMP
- CCGEP
- CrewChief.INI
- graphicsRearViewLODMultiplier = 4.0
- CrewChief.INI
- PLR
- Moving Rearview="0" // Whether mirrors respond to head movement in cockpit (0=none, 1=position-only, 2=FOV-only, 3=both
- Rearview Front Clip="2.00000" // Front plane distance for mirror (0.0 = use default for scene)
- 2.0 removed arms and steering wheel visible in mirrors even when "Self In Cockpit Rearview=0"
- Note: Values greater than 0.0 may start to "clip" (remove) objects as they approach your car. For example, on the Stock Car Brazil mod, objects like the opponent bumpers, hood, engine, etc. are progressively culled in the mirror which looks really weird. But that mod has mirror issues and I haven't seen that behaviour in original cars or other mod cars.
- Rearview Back Clip="5000.00000" // Back plane distance for mirror (0.0 = use default for scene)
- Self In Cockpit Rearview="0" // 0=none, 1=rear wing & wheels, 2=body & susp, 3=1+2, 4=cockpit, 5=1+4, 6=2+4, 7=all
Fix for tracks not showing all details in mirrors
- Original Link
- tl;dr Search and replace VisGroups=(32) in TRK files
- 32 is the VisGroup for instances that should not show up in the mirrors. So, by deleting these VisGroups occurrences, the instances will show up in the mirrors.
- Regex Search:
VisGroups=\(32\) - Regex Replace:
(leave blank) - Regex Search to Confirm:
VisGroups\s*=\s*\([^\)]*32[^\)]*\)- There should be nothing found
Sometimes on certain tracks perfect mirrors does not give the detail expected ie St Marys Goodwood and Mid Ohio Sports Car course
as examples the fix as supplied by Sunalp2 is given below and works on all tracks for max mirror detail:

------------------------------------------------------

It’s in the TRK file.

Visgroups=(32)

That stops things showing in the mirrors, it helps the frame rate.

To fix Goodwood, or any other track, first make a copy of the TRK file for a back up.
Then open the TRK File in Notepad, in edit select REPLACE, in the top box put Visgroups=(32), leave to bottom box empty,
then hit REPLACE ALL.
This will delete all instances of Visgroups=(32) in the file.

That will make everything show in the mirrors.

Thank you Sunalp2 yes, yes thumbup thanks

-Wingnut
Question about what exactly to change: [36]
[quote="Andrahr"]I don't understand this post, as there are many of these

“Visgroups=(32)”

entries.

What should be changed here?[/quote]

That means those items won't be shown in the mirror.

To see those things in the mirrors just delete that entry.

When tracks are converted, or modified with 3dSimEd, all the INSTANCE entries have that.

-Wingnut
Settings DDB Tweaks - Fix SpinRecovery Resetting, Enable/Disable Difficulty Options, Etc.
Just wanted to say the Spin Recovery thing is enabled/disabled in GameData\Settings.DDB:

    Difficulty
    {
      Beginner
      {
        Assist
        {
          SpinRecovery = 1
          Invulnerability = 1
          Autopit = 1

I believe 0=Locked Disabled (Cannot Enable), 1=Enabled, 2=Disabled

Better just to stick to Simulation and unlock what you want to change in-game. Who knows what the game is changing behind the scenes when you select Novice.

Note Autopit option, too.

You can do other interesting things, too, like allow easier AI in Simulation:

    Professional
      {
        AIStrength = 80 //100 -- Can now scale AI from 80-100
        AIAggression = 0.70 http://1.00 -- Can now select Timid AI
        Damage = 0 //100 -- Can now lower Damage
Hidden User PLR Parameters
Some parameters in UserData\User\User.PLR are not available in-game but can be modified by editing User.PLR.
There are many parameters that are hidden away in the PLR but here are the most interesting ones:
- Raindrop Flow="2" // Add to enable: 1=flow over current 2=flow over other vehicles
- Rainspray Flow="2" // Add to enable: 1=flow over current 2=flow over other vehicles
- Smoke AI Threshold="0.25000" // Point at which smoke is generated for AI car wheels (0.0 - 1000.0, lower = more)
- Wheels Visible In Cockpit="1" (For open-wheelers)
- Swaying Trees="1" (Tracks must implement swaying trees and this doesn't seem common)
- Ghost max alpha value="0.00000" (Disable Ghost in Time Trial)
- Vehicle Removal="3.00000" // Seconds until stationary vehicle is removed from track (sug: 30)
- Crash Recovery="0" // Artificially keep cars on track ie. auto flip cars upright
iRacing-like Brake Sensitivity for Potentiometer Pedals (eg. G27)
If you’re used to iRacing and have potentiometer based pedals, like G27 pedals, you’re probably used to an iRacing default Brake Force Factor of 1.80x. In GTR2, and many other sims, brake sensitivity is linear and won’t feel like iRacing braking. You can achieve iRacing-like braking sensitivity by adjusting Brake Sensitivity in the in-game control options and lowering the value. Personally, based on my measurements, somewhere between 0-25% brake sensitivity is similar to iRacing braking progression judging by the in-game brake meter. Give it a try and use what you like best.
Note: I’m still testing, myself. It’s somewhere less than 50%, though, as 50% is linear in SimBin games.
If you don’t have potentiometer pedals, you may or may not want to adjust the brake sensitivity. I’ll assume you’re an advanced user, if you have these higher-end pedals, and you know what you want from them.
Auto-Clutch With Paddle Shifters
You may find you want to use auto-clutch, available in the Realism settings, when making use of paddle shifters, otherwise shifts will be abrupt and may cause unwanted wheel spin on up-shifting or lock-up on down-shifting.
On the other hand, these kinds of cars, with sequential shifters, were apparently capable of up-shifting without clutch action, down-shifting may have required a throttle blip, and launch, pitlane, and low-speed shifts required the clutch to avoid stalling. So, it may be more realistic to leave auto-clutch disabled.
GTR2's clutch and tranmission model is very forgiving, as well, is another reason to leave auto-clutch disabled. That is, even down-shifting doesn't really ever require a throttle blip and launch, pitlane, and low-speed shifting probably won't be an issue either, although it certainly is in real life.
Disable Auto-pit and AI Control
By default, your car will enter “auto pit” mode when you enter and exit the pits meaning AI controls your car until you exit the pits. Being used to driving the cars in pits, myself, I disable this:
- Edit your UserData PLR file
- Under “[ DRIVING AIDS ]” set:
- Autopit="0"
- No AI Control="1" // AI never has control over car (except autopit)
Improve your driving by Turning up Tire Scrub and Tire Skid volume
Go ahead, turn up tire scrub and tire skin in the audio options and I think you’ll find it’s one more piece of information you can use to aid your driving around the track. I always find it helpful to match up the audio of slips and slides with the visuals and the force feedback.
Don’t skip sessions (causes AI bug). Use Time Acceleration, instead.
Don’t skip sessions. Use Time Acceleration.
Skipping can result in AI not setting laptimes and this results in randomly placed AI on the grid in addition to AI laptimes that don’t match the AI difficulty level set if you had run the session to completion instead of skipping.
Always time accelerate, never skip.
Use the Timing screen to make Time Acceleration go even faster.
Adjusting Your Seat / Adjusting Your Eyepoint
My recommendations for best seat adjustment:
- Side and rearview mirror should be more-or-less half visible
- Rearview mirror should be in the top third of your screen space (ie. not cut off on top)
- In-game steering wheel should be half cut off at the bottom of your screen
Notes:
- Eyepoint adjustment is done with the Crew Chief GTR2 Enhancements Plugin
AI Too Fast Even At Lowest Difficulty
From this question:
"GTR2 F1 2005 MOD - the AI are unrealistically fast: in other words not matching 2005 reality. Opponents strength slider is from 100-to-120% so unable to lower that. Can someone please advise how to rectify the situation in the mod?"
- You could edit GameData\Settings.ddb and set AIStrength to 80 (under Professional) to allow you to move the slider down
- You could edit GameData\Locations\<LOCATION>\<LOCATION>.AIW and tweak RaceRatio
- And you could edit GameData\Talent\*.RCD files, whichever files are being used, and tweak performance-related params
- Another effective change is altering AI grip in Location GDB files:
- RoadDryGrip = x.xx
- AIDryGrip = x.xx
- RoadWetGrip = x.xx
- AIWetGrip = x.xx
- AI should have around 14% less than player's grip. These values are inside track's gdb.
- Note: 14% seems excessive?
- You can also edit Braking and Cornering params in the UserData\<USER>\<USER>.PLR file:
- AI Brake Power Usage
- AI Brake Grip Usage
- AI Corner Grip Usage
Rough Notes on Adjusting AI Difficulty Based on Player Laptime Delta
Rough notes, not hard truth
AI Adjustment
- Reminders:
  - Confirmed: Must run qualifying
  - Confirmed: All AI must put in qualifying times
  - Confirmed: Do not need to complete qualifying, just need all AI to put in times. And your time will be respected and your grid position correctly applied even if you skip the qualifying session, once all AI and the Player have put in a time.
  -
- Slower than AI:
  - Adjust AI by Delta (seconds) / 0.250
    ^ Intent: Delta = AI laptime diff vs player (in seconds). Say it's 1 second: 1sec / 0.250 = 4. So, 4 is the AI Difficulty adjustment to make. Eg. Adjust 100 to 104
  - If Adj > 10 then (Delta / 0.225) + 2
    - Ex. 4.48 / 0.225 = 19.911 =~ 20 = 100 - 20 = 80 + 2 = 82
- Faster than AI: Adjust AI by Delta / X.YYY?
- Ex. 2.829 / 0.250 = 11.316 =~ 12 = AI 100 - 12 = AI 88
- If AI don't change enough for the adjustment, check Location AIW and replace Worst/Mid/BestAdjust with defaults:
    WorstAdjust=(0.7500)   // Used for  70% AI strength option
    MidAdjust=(1.0000)     // Used for 100% AI strength option (note that AIs now use full throttle above 95% AI strength option)
    BestAdjust=(1.1000)    // Used for 120% AI strength option
- If AI don't race at expected pace, check Location AIW and insert/replace Qual/RaceRatio with defaults:
    QualRatio=(1.0000)     // Used to adjust AI speed in qual compared to base values
    RaceRatio=(1.0500)     // Used to adjust AI speed in race compared to base values
Steam GTR2 vs Disc GTR2
This is a list of differences between the Steam version of GTR2 and the Disc version of GTR2, at least so far as I am aware.
- Steam:
- EXE and DLLs: Various EXE and DLL files are different which produce the differences we see in-game.
- Missing or Grayed Out Cars: Ferraris and Porsches are grayed out on track and not available in the menus. See fix here.
- Hockenheim GP Slow AI: AI cars drive around track at what appears to be pit limiter speed. See fix here.
- Hockenheim Short Uncounted Laps: Laps are counted. See fix here.
- Disc:
- No notes yet
- Notes:
- The Modern GTR2 Patch may be of interest. Right now (260315) it's just a ZIP that converts a Disc EU 1.0/1.1 to Steam GTR2.
File Differences Between Steam vs Disc Versions of GTR2
File differences between a pristine Disc install vs a pristine Steam install produced by WinMerge via PortableApps.
-
 File Differences Between Disc EU 1.1.0.0 and Steam as of 2023-12-08
 -
 File Differences Between Disc EU 1.0.0.0 and Disc EU 1.1.0.0
 -
 File Differences Between Disc EU 1.0.0.0 and Steam of as 2023-12-08


Notes:
- A "pristine" install means installed but not run yet
How To Make Disc GTR2 From Steam GTR2
Caution: The following works, and is probably fine for most users, but it is not technically correct or complete: See the Modern GTR2 Patch for patch ZIPs that make this an easy process.
Starting from a clean and up-to-date Steam GTR2 folder:
- Copy over Disc EXE and DLLs files. These files can be acquired from official patches.
That should bring an updated Steam GTR2 up to an up-to-date version 1.1.0.0 Disc GTR2. There are some other inconsequential file differences (see screenshots above) but that should do it.
Caution: This is a work in progress and may not be completely correct but I’ll keep updating it as I find out more.
Fixes
Driver Names With Accented or Special Characters or Question Mark Or Other Weird Characters
- tl;dr Convert RCD files with special/accented characters (regex: [^\x00-\x7F]) in them to Windows-1252 (ANSI) encoding.
- Context:
- Steam GTR2 driver Talent RCD files are UTF-8 encoded and this is fine except when other encodings are used for special/accented characters, usually Windows-1252 encoded characters.
- Then, GTR2 will display a question mark or other weird character in place of these special/accented characters when shown in-game.
- These files cannot be UTF-8 encoded, they must be converted to Windows-1252 encoding in order for GTR2 to display the character properly in-game.
- GTR2 is fine with ascii/utf8 files except for any special/accented characters which must be in Windows-1252 (ANSI) encoding to display properly in-game.
- You can do this two ways: Notepad++ Search&Replace or a Powershell script
- Notepad++
- Search for regex [^\x00-\x7F] (special/accented characters) in *.RCD files and any file found should be converted to Windows-1252 (ANSI) by Encoding > ANSI or Encoding > Character Sets > Western European > Windows-1252
- OK: Notepad++ will detect Windows-1252 encoded files as ANSI on reload
- Search for regex [^\x00-\x7F] (special/accented characters) in *.RCD files and any file found should be converted to Windows-1252 (ANSI) by Encoding > ANSI or Encoding > Character Sets > Western European > Windows-1252
- Powershell script
- See find-invalid-encoded-rcd-files-5.ps1 below
Notes:
- Encoding "normalization" is required, conversion is not enough
- Encoding normalization is the process of converting characters from one encoding to another that have a 1:1 mapping, mapping others to reasonably similar characters eg. UTF8/ANSI accented é to ASCII e, and mapping all others to wildcard characters or perhaps just stripping them altogether
- The script below (as of 260315) does not normalize so some characters will still not show properly because the character in UTF8 did not have a valid Windows-1252 character
find-invalid-encoded-rcd-files-5.ps1:
# This script finds *.RCD files in the current folder and its subfolders, checks if they're both UTF8 and have non-ascii characters, and then converts only those files to Windows-1252 encoding.
# ^ This implies that GTR2 is fine with ascii/utf8 files but any special characters must be in Windows-1252 encoding not 'high ascii' or something else. ISO-8859-1 (Latin-1) should be fine, as well, since only a few characters differ.

function Test-IsUtf8 {
    param([string]$Path)

    $bytes = [System.IO.File]::ReadAllBytes($Path)
    if ($bytes.Length -eq 0) { return $false }

    try {
        # Try to decode the whole file as UTF-8
        $decoder = [System.Text.UTF8Encoding]::new($true, $true)  # strict + throw on error
        $decoder.GetString($bytes) | Out-Null
        return $true
    }
    catch {
        return $false
    }
}

# Get all *.RCD files in current folder and subfolders
Get-ChildItem -Path . -Recurse -Filter *.RCD | ForEach-Object {
    $filePath = $_.FullName
    #$content = Get-Content -Path $filePath -Raw
	$content = [System.IO.File]::ReadAllText($filePath)

	if (Test-IsUtf8 $filePath) {
		# Check if file contains any non-ASCII character (char code > 127)
		if ($content.ToCharArray() | Where-Object { [int]$_ -gt 127 }) {
			# Convert content to Windows-1252 and overwrite file
			[System.IO.File]::WriteAllText($filePath, $content, [System.Text.Encoding]::GetEncoding(1252))
			Write-Host "Found: $filePath"
		} else {
			#Write-Host "ASCII only, skipped: $filePath"
		}
	}
}
Avoid Dark Screen Driving Through Shadows
Easy Fix - Just set Shadows High:
- Set Shadows to High in-game to avoid the whole cockpit going very dark in shadows
- Windows in reality do not go very dark just driving through shadows because of the sheer overwhelming ambient light of the environment but mod cars often have this problem
Advanced Fix - Keep Shadows Full and Edit Car CAS Files:
- Set Shadows to Full in-game to enjoy original and mod cars that properly support full shadows
- Then edit car mod CAS files and set ShadowReceiver=False, for the Windows mesh, if present, or the entire Cockpit mesh otherwise
- These MeshFile lines may be found in Instance=COCKPIT or Instance=WINDOWS or similarly named sections
CAS File:
- Perform a Search and Replace on *.CAS files for the GameData\Teams\<CLASS>\<VEHICLE>\<TEAM>\ folder that contains cars without proper shadow support
- Use an editor like Notepad++ with regular expression search and replace functionality
- Option 1: Replace in Windows/Glass/Mirrors MeshFile lines. This removes shadows only on car windows/glass/mirrors. If they are present, you're done, otherwise try the second option.
- Option 2: Look for Cockpit MeshFile lines. This removes shadows on the entire car cockpit. If they are present, you're done, otherwise the third option.
- Option 3: Look for CPIT MeshFile lines in Instance=COCKPIT sections. This removes shadows on all objects in the cockpit.
- Additionally, you may find other objects you prefer to disable shadows on eg. Mirrors, Steering Wheel, Driver Arms, etc.
- Exact search-and-replacements regular expression patterns below easily used in popular text editors (eg. Notepad++)
Option 1: First, Search & Replace in Windows/Glass/Mirrors MeshFile Lines
- Find: MeshFile=(.*(window|cpitwindow|cpwind|glass|mirror|MONITOR_LCD|COCKPIT_LCD|CPIT.?BANNER|COCKPIT.?BANNER).*\.gmt .*)ShadowReceiver=True(.*)
- Replace: MeshFile=\1ShadowReceiver=False\3
- Example:
  Instance=WINDOWS
  {
    <LOW>  MeshFile=R3E_ARG_WINDOWS_B.GMT CollTarget=False HATTarget=False ShadowReceiver=True LODIn=(0.0) LODOut=(20.0)
    <LOW>  MeshFile=R3E_ARG_WINDOWS_C.GMT CollTarget=False HATTarget=False ShadowReceiver=True LODIn=(20.0) LODOut=(50.0)
    <LOW>  MeshFile=R3E_ARG_WINDOWS_D.GMT CollTarget=False HATTarget=False ShadowReceiver=True LODIn=(50.0) LODOut=(250.0)
  }
  Instance=COCKPIT
  {
    MeshFile=BMW_320si_TC_COCKPIT.gmt CollTarget=False HATTarget=False ShadowReceiver=True LODIn=(0.0) LODOut=(2.0)
    MeshFile=BMW_320si_TC_NUMBERPLATE_Style<2>.gmt CollTarget=False HATTarget=False ShadowReceiver=True LODIn=(0.0) LODOut=(2.0)
    MeshFile=BMW_320si_TC_MIRRORS.gmt CollTarget=False HATTarget=False ShadowReceiver=True LODIn=(0.0) LODOut=(2.0)
    MeshFile=BMW_320si_TC_WINDOWS_INT.gmt CollTarget=False HATTarget=False ShadowReceiver=False LODIn=(0.0) LODOut=(2.0)
  }

Option 2: Otherwise, Search & Replace in Cockpit MeshFile lines
- Find: MeshFile=(.*cockpit.*\.gmt .*)ShadowReceiver=True(.*)
- Replace: MeshFile=\1ShadowReceiver=False\2
- Example:
  Instance=COCKPIT
  {
    MeshFile=Praga_R1_ProtoType_Cockpit.gmt CollTarget=False HATTarget=False LODIn=(0.0) LODOut=(2.0) ShadowReceiver=False
    MeshFile=Praga_R1_ProtoType_Cockpit_Shell_STYLE<4>.gmt CollTarget=False HATTarget=False LODIn=(0.0) LODOut=(2.0) ShadowReceiver=False
  }

Option 3: Search & Replace in CPIT MeshFile lines
- Find: MeshFile=(.*cpit.*\.gmt .*)ShadowReceiver=True(.*)
- Replace: MeshFile=\1ShadowReceiver=False\2
- Example:
  Instance=COCKPIT
  {
    MeshFile=991GT3R_COCKPIT.GMT CollTarget=False HATTarget=False ShadowReceiver=False LODIn=(0.0) LODOut=(5.0)
    MeshFile=991GT3R_CPITBODY.GMT CollTarget=False HATTarget=False ShadowReceiver=False LODIn=(0.0) LODOut=(5.0)
    MeshFile=991GT3R_CPITEXTMIRRORS.GMT CollTarget=False HATTarget=False ShadowReceiver=True LODIn=(0.0) LODOut=(5.0)
    MeshFile=991GT3R_CPITBONNET_F.GMT CollTarget=False HATTarget=False ShadowReceiver=True LODIn=(0.0) LODOut=(5.0)
  }

Option 3b: Windscreens
- Find: MeshFile=(.*cpwind.*\.gmt .*)ShadowReceiver=True(.*)
- Replace: MeshFile=\1ShadowReceiver=False\2
- Example:
  Instance=COCKPIT
  {
    MeshFile=BMW_M3_COCKPIT.gmt CollTarget=False HATTarget=False LODIn=(0.0) LODOut=(2.0) ShadowReceiver=Falsey
    MeshFile=BMW_M3cpwind.gmt CollTarget=False HATTarget=False LODIn=(0.0) LODOut=(2.0) ShadowReceiver=True
  }

Fix Mirrors that go dark through shadows:
- Find: MeshFile=(.*mirr.*\.gmt .*)ShadowReceiver=True(.*)
- Replace: MeshFile=\1ShadowReceiver=False\2

Fix Steering Wheels that go dark through shadows:
- Find: MeshFile=(.*SWHEEL.*\.gmt .*)ShadowReceiver=True(.*)
- Replace: MeshFile=\1ShadowReceiver=False\2

Fix Driver Arms that go dark through shadows:
- Find: MeshFile=(.*INT_DRIVER_STYLE.*\.gmt .*)ShadowReceiver=True(.*)
- Replace: MeshFile=\1ShadowReceiver=False\2
- ...or...
- Find: MeshFile=(.*INTERIOR.*\.gmt .*)ShadowReceiver=True(.*)
- Replace: MeshFile=\1ShadowReceiver=False\2
Details:
- Keeping Shadows Full is preferable as some car interiors can have a dramatically different feel with full shadows
When the windshield isn't separate from the cockpit:
- If not already exposed separately in the CAS file, you will have to use 3DSimEd to separate the windshield/windscreen objects from the cockpit objects and expose them in the CAS file in order to be able to disable shadows on them
- These steps are now documented here: 3DSimEd#Separate Window Materials From Cockpit or Other Objects
Real-world Racing Example of Windows staying bright going through shadows:
- Watch this real world onboard at 0.25x speed to see the cockpit go a little dark underneath the last turn bridge at Sebring while the windows stay very bright
Fixing Track Shadows Instead of Car Shadows To Improve Performance
Overview:
- Some tracks cause problems when Full Shadows are being used
- Apparently due to poorly optimized track shadows
- Moving from Full to High Shadows in-game usually solves this but you give up the highest quality shadows in the car even for other tracks that aren't a problem
- Instead, you can edit the Location's TRK file to change Dynamic ShadowCasters to Static which solves the performance issues on the problem track allowing you to keep Full Shadows enabled in-game
- Details: Optimizing Shadows in GTR2
How To:
- Edit Location TRK file
- Find lines with: ShadowCaster=(Dynamic, Solid, 128, 512)
- Change these to: ShadowCaster=(Static, Solid, 128, 512)
- Search and Replace Regular Expression for use in a text editor like Notepad++:
- Search:
ShadowCaster=\(Dynamic\s*,\s*(.*)\) - Replace:
ShadowCaster=\(Static, \1\)
- Search:
- If you can find the problem ShadowCasters then limit your search and replace to only those instances otherwise you lose the value of Full Shadows for the entire track
- But, if you can't find the problem ShadowCasters (like at Sendai HiLand; see below) then do them all
Alternative:
- If the ShadowCaster change didn't work then undo those changes and then change ShadowReceiver=True to ShadowReceiver=False
Consequences:
- The TRK ShadowCaster fix means you're removing Shadows that "land" on surfaces
- So, for instance, going under a bridge normally darkens your car momentarily
- But with Static ShadowCasters, it's only a visual shadow on the road and won't affect your car
- For problem tracks, this is the only solution for end-users as it requires editing the track in an app like 3DSimEd otherwise
Case: Sendai HiLand
- Dramatic frametime jitter improvement moving from Full shadows to High
- From a very unpleasant experience to a smooth, enjoyable experience
- Most tracks do not have this problem with these cars (DTM 2013)
- So, can only assume it's unoptimized track shadows
- And should be able to run Full shadows if optimized
Mod Has Conflicting Driver Gloves and Suits
- Update: This doesn't always work. Eg. Some mods with genstrings crash when removing these files.
- Remove mod's GameData\Teams\{ARMS_*.DDS,BODY_*.DDS,DRIVER_*.DDS,int_*.gmt,M-FPDRIVER*.gmt}
- Eg. DTM 2018 came with its own but I had the HD Gloves and Suits mod installed so I just removed any related files from the mod.
- It's possible that you could move these files into GameData\Teams\<TEAM>\ could still allow those cars to override the global gloves and suits, as this kind of folder structure overriding trick is used elsewhere, but I haven't confirmed this yet.
Mod Has Conflicting Stex GTR Files
- Rename stex file to something unique
- Update CAS file MASFILE=.*stex* references to the new unique name
Mod has conflicting Sounds files - Consolidate mod Sounds folders
Sometimes mods re-use GameData\Sounds\xxx folders from other mods, but leave them in place which creates a conflict with the original mod or another mod that shares those sounds in the same place.
Consolidate Mod Sounds Folders:
- Files:
*.aud - Search:
=(\s*)(.*\\.*\.wav) - Replace:
=\1GT4_Series\\\2- Intent: Add a subfolder prefix to existing sound file lines in AUD files so that GTR2 now looks in the subfolder and not the original folder where it was in conflict with other mods.
- Do NOT use spaces in sound paths. It seems to work for other paths but at least not for sound paths.
Crash loading into track - Error loading mesh file - Missing GMT
- Check UserData\Log\trace.txt
- Run GTR2.exe -trace=1000 to generate trace.txt if you don't already run it that way
- You'll see errors like this:
vehgfx.cpp 2598: Entered VehGraphics::Init(GAMEDATA\TEAMS\ESR GT\LISTER STORM TEAMS\ESR ICEMAN RACING\..\ESR_LISTER_STORM.CAS)vehgfx.cpp 2642: Unable to read C:\Users\Matt\AppData\Local\Temp\vehgen.scn30: Error loading mesh file LISTER_STORM_WHEEL_LF_2DWA_STYLE3.GMT to memory
- The file LISTER_STORM_WHEEL_LF_2DWA_STYLE3.GMT should exist in one of the SearchPath locations defined by the Team's .CAS file either as a regular file or in a GTR Archive (use Geditor to view GTR archives, it can also extract the files)
- If the GMT file does exist, then there may be a problem with the SearchPath parameters
- If the GMT file does not exist, as a file or in a GTR archive, then you need to check the .CAR GenString parameter:
- These determine options on a car, one of them being wheels. The CAR file may give you a legend of what the digits in the GenString mean. Otherwise, the mod may contain a README or other document that explains it.
- At any rate, you need to identify the offending digit and change it to one that works
- If there are CAR files that work fine and don't crash, check their GenString and note the differences.
- If you can narrow down the offending GenString digit then you can reuse that digit in the CAR file's GenString that causes the crash.
- If you can't narrow it down then you may still just be able to copy the whole working GenString to the CAR file's GenString that causes the crash and replace it.
Fix Rainspray Inside Cockpit (And Smoke/Flames/Dust/Etc)
- If rainspray appears inside the cockpit then expand Vehicle Flow Radius:
- Vehicle Flow Radius="6.0" //"3.00000" // Vehicle sphere radius for smoke/flames/dust/spray
- 6.0 may be too much, but shows that it does work
- This is basically a bubble around your car inside which effects like rainspray do not appear
- Vehicle Flow Radius="6.0" //"3.00000" // Vehicle sphere radius for smoke/flames/dust/spray
GMT and EFX meshes diff too much
- tl;dr I don't have a fix for this yet. This is a placeholder for now to document what it really means.
- GMT: 3D Model
- EFX: Effect Animation
- EFX define how a mesh (the .GMT file) moves or deforms during a specific action—most commonly used for backfire/exhaust flames, driver animations, or trackside objects like flags. -AI
- Loading: Via vehgfx.cpp during car init from .CAS (e.g., AC2_P992CUP.CAS); engine checks vertex/topology match vs. GMT—if "diff too much," compensates (slows load, no CTD). -AI
- Trace.txt error: AnimationAct 204: GMT and EFX meshes diff too much.
Fix Error Opening MAS File Skies*.GTR
vidman.cpp 1354: CUBE error loading TRK file USERDATA\LOG\tmp.TRK: Error opening MAS file SKIES_CENTRAL.GTR- Check Location TRK file SearchPath params reference folders that actually exist
- For example, a track I had was looking inside a subfolder V8SC like this:
- SearchPath=GAMEDATA\LOCATIONS\V8SC\Mallala
- SearchPath=GAMEDATA\LOCATIONS\V8SC\Shared
- But the files were in the parent folder
- So I removed V8SC like this:
- SearchPath=GAMEDATA\LOCATIONS\Mallala
- SearchPath=GAMEDATA\LOCATIONS\Shared
Fix Low Ambient and Track Temperatures when using Real Weather
When using Real Weather:
- If temperatures seem on the low side, update the Location GDB RaceDate month to reflect the location's peak racing months which are typically warmer.
- This issue can often come up with far Southern Hemisphere locations such as in Argentina, Australia, Chile, New Zealand, Tasmania, etc.
Fix Incorrect Sun and Shadow Positions
- If the sun and shadows seem incorrect, update the Location GDB Latitude.
- Wikipedia often includes coordinates of locations (usually on the right-hand side on desktop)
- Find the location in Google Maps and right-click to copy the Latitude (should be the top option in the popup context menu)
- AI chatbots can also make this easy: Just ask AI to provide the latitude for a list of tracks/locations
- Verify AI outputs with Wikipedia and/or Google Maps
Known Issues
Skipping Qualifying Results In Random Grid Positions And Unrealistically Fast AI Lap Times
Don't skip. Use time acceleration. Wait for all AI to return to pits (ie. White colour in the Grid and Timing screens).
There is an issue where skipping the rest of your qualifying session will result in the AI having faster lap times than they should have. Additionally, when starting a race, starting positions may appear to be randomly set instead of using qualifying times.
Use Time Acceleration to get the end of qualifying more quickly. Use the Timing screen to make Time Acceleration go even faster.
The Leader’s Advantage AI Quirk
Update 2023-07-29: This has to do with the Composure parameter in Talent RCD files. I have experimented with this to good effect in the SHO Competition AI mod.
When the player is ahead of the AI, the AI have tendency to go slower than if they were ahead of the player. This can happen even when qualifying suggests competitive timings: Even if you start further back in the grid, if you can manage to get out in front then the AI have a tendency to slow down.
Also, if you start further back in the grid, try to make up as much ground as possible or else the AIs ahead of you, especially top 3 or so, will tend to be uncatchable for the rest of the race.
I guess the ‘solution’ here is to find out where qualifying place results in a competitive race for you. For example, I try to qualifying top 3-6, at least, and make sure I stay up with the faster cars off the start.
AI Performance versus Player Participation Observations
GTR2 AI vs Player Observations
- If Player does not put in laps, AI are less performant than if Player was out on track lapping
- I believe this is true of Practice, Qualifying, and Race
- AI will plateau at a certain performance until Player comes out on track and beats their laptimes
- AI will then start putting in better lap times when out-performed by the Player
- Eg. I often time accelerate Qualifying, so track is warmed up and rubbered in, then I go out and put in laps. If I take over first spot, I've observed AI become more competitive, their times get faster, and they may even leapfrog my position. But, if I don't lap and just time accel the whole session, they remain at their plateau.
- This effect is not very large. One AI might leapfrog you, maybe two or three, but rarely more, if you put in a solid fast laptime.
AI Change Tires Too Close To The End Because It's Drying out
- AI may change tires with 1 or 2 laps to go just because it's drying out instead of trying to push to the end
- It seems they're not aware of how many laps are left and how to judge whether they should change tires late in a race
- The Crew Chief GTR2 Enhancements Plugin has improvements for AI pitting behaviour
Swingman Rear View Takes A Long Time To Orient Above Car
Edit UserData\defviews.cam and, in the LocalCam=SWINGMAN section, increase the first parameter of the OrientationRate.
For example, I use OrientationRate=(9.30000, 2.43750000, 0.000000). This ensures that the camera moves quickly from being about bumper level to being above and behind the car as you would probably expect from other video games with external, rear racing views.
I have confirmed that the first two parameters of OrientationRate are Pitch (up/down) and Yaw (left/right). That is, the camera moves in relation to the center-point of the car.
I assume the third parameter is Roll (left/right rotation) and it’s disabled by default because flipping the camera upside-down when your car crashes would be counter-intuitive but I haven’t found an easy way to confirm this.
Swingman Rear View Follows Too Narrowly Behind Car
The other tweak to OrientationRate=(9.30000, 2.43750000, 0.000000) I do is the second parameter (Yaw) which I set to 2.43750000.
Decreasing Yaw rate allows the camera to lag behind the angle of the car just a bit more than normal so that going around corners you see a bit more of the car. I kinda wanted to show off the cars more like in Forza Horizon, etc.
Steam Discussion post with valuable low-level details
Note: You probably don’t need any of this if you followed #Minimum GTR2 above. But I’ve left this here for the low level details.
Location GDB File Names Must Be Unique
- Even if the Location folder name is unique, each GDB inside the folder must be globally unique to all other GTR2 locations
- Case:
- Interlagos.GSC.2011.v1.0.GTR2.rar and Oulton.Park.2005.v2.01.GTR2.rar both have Inter.GDB
- Loading Oulton Park loads properly but loading Interlagos loads...Oulton Park
- It's just a conflict. They each need unique names.
- Recommendations:
- Don't use shortforms
- Include qualifiers such as year, layout, and modder initials
- eg. 09Mosport.GDB, 2012RoadAmerica.GDB, ShovasImola19.GDB
Improve Car Collision Weightiness
Work In Progress

When you bump up against an AI car, it can feel like running into a brick wall, like they have a tonne more weight than you.
"In other words, it's AI Resistance to Pitch, Yaw and Roll respectively" (Handy thread: AITorqueStab help please)
You can improve this without changing the physics by modifying the Talent RCD file AITorqueStab parameter.
Edit UserData\Talent RCD files and tweak AITorqueStab: "torque adjustment to keep AI stable"
- GTs
- To-Do
- NGTs
- AITorqueStab=(1.25, 1.25, 1.25) // torque adjustment to keep AI stable
- No recommendation at this time. Haven't dialed in an acceptable tuned value yet.
- AITorqueStab=(1.25, 1.25, 1.25) // torque adjustment to keep AI stable
- Mod Cars
- To-Do
Save Game SVE Files Remember Unexpected Parameters
- SVE files, such as UserData\<USER>\Save\GameSIMWEEKEND.sve appear to save parameters that you might expect it to load from existing files, such as Location GDB or AIW files
- This means that you can't just save a session and tweak files in the background. You actually need to start a whole new session for the new parameters to take effect.
- One example is AIW RaceRatio
- Case: While testing a track where race performance did not match qualifying performance, I kept reloading the same save while tweaking AIW and RCD params but wasn't seeing the AI change their performance, even restarting GTR2 completely in between. Then, I crashed early one session and restarted from the ESC menu and instantly the cars were obviously up to the performance I had been editing in the files.
- I don't know an exhaustive list of parameter values saved in SVE
- A number of file names and extensions occur in GameSIMWEEKEND.sve which could be a hint as to which files it is storing values for (but I don't know for sure):
- TRK, AIW, CAR, GDB, BMP, SCP, there may be more I'm not sure
Bugs
School Track Temperature Always 0C
- Track starts at 0C even though Ambient is correctly set at 20C
Troubleshooting
Got a bug? Try a New Profile.
- Try creating a new profile to see if a default profile exhibits the same issue
- I know it might sound cliche, like "Have you tried turning it off and on again?", but it helped fix a very tricky pitstop bug that was broken on an existing profile for me but working when I created a new profile
Wheel/Pedals not working - GTR2 3 USB Device Limit
These notes are from The Iron Wolf's tips in the Crew Chief GTR2 Enhancements Plugin manual.
GTR2 has a 3 USB device limit. The strategy for working around this limit is:
- First, try making your wheel/pedal the top USB devices.
- You can either disconnect as many devices as you can, or you can use tools like Devreorder or USBDeview to reorder, hide, or disable your USB devices so that game picks up wheel/pedals.
- It is important to get wheel/pedals to work directly in the game, as for buttons that are not working there’s a workaround (Joy2Key or AntiMicroX), but wheel/pedals need to be detected directly by the game.
- Once you have pedals/wheel recognized by the game, you may find that the game does not detect some of your shifters/buttons etc.
- To work this around, use one of the many tools available to map button presses to keyboard presses, then assign keyboard keys to various game actions. I personally use Joy2Key. There is also AntiMicroX.
Enable Debug Tracing
- Launch GTR2 with -trace=1000
- For Steam, right-click your game in your Library
- Click Set Launch Options button
- Add -trace=1000 in the text box
- If a crash happens then check UserData\Log\trace.txt
- Errors are likely near the end of the file. Google for the error message and you’ll likely find some tips to help fix it.
Crashes Loading Tracks
- Try uninstalling previously installed mods and see if the problem happens.
- To make this a little easier, make a backup of your GTR2 folder before you install new mods so you can rollback easier just by renaming folders.
- Use one of the freely available Mod Managers such as Open Mod Manager, OVGME, or JSGME
- This can also be related to large mods that need a lot of memory: So use the #4GB Patch mentioned above.
Black Screen Driver Stopped Responding Freezes
Update: This was due to an (unknown to me) bad video card and replacing the video card solved the problem.
If you experience graphics related crashes, such as ‘driver stopped responding’ black-screen freezes:
- Try using DirectX 8, not Auto or 9 in GTR2Config.exe. This “solved” these types of crashes for me on Windows 7 (NVIDIA 980 TI).
Broken Characters and File Encoding Issues for Windows 1252 "ANSI" vs UTF-8
- tl;dr Convert problematic files to Windows 1252 "ANSI" encoding using an editor like Notepad++
- The problem is modern Windows and applications uses UTF-8 and even ISO-8859-1, the previously common file encoding, is still not exactly the same file encoding GTR2 expects, which is: Windows 1252 "ANSI"
- Sometimes I see track names or driver names with accented characters that don't show up properly: This is because GTR2 expects Windows 1252 "ANSI" file encoding and the file is almost certainly in some other encoding. You can convert to Windows 1252 "ANSI" in Notepad++ and it should be safe (I haven't experienced any corruption yet).
- Bonus: This is likely the reason so many European driver names in Talent RCD files from mods have broken character display too. Solution is probably the same.
Testing
Monitor Timing Screen and Video for AI and Pits During Race
- Start a race, wait for green, then quit back to the garage
- You'll be at the Timing screen and you can also go to the Monitor to see video
- You can watch the pits or switch to individual cars to see what they're doing live on track
- This also makes it more convenient to step out of the race, let it continue, and alt-tab to other apps such as CCGEP Monitor
Crew Chief GTR2 Enhancements Plugin Monitoring App
- Try the CCGEP Monitor for a handy app that shows Player and AI drivers with a lot of detailed info not available in-game
- This can help you better diagnose issues while testing
Credits
- Featured Image
- Content from the original Secrets of GTR2 post by Shovas (owner of this site, as well)
Scratchpad
==
250823

- GTR2 Brakes Lock Up Too Easy ie. No ABS
  - Heavier load cell style brakes will help. My brakes actually require a bit of effort to get to 100% and that helps alleviate brake lock-up because it really requires deliberate intention to get that much braking pressure.
  - Alternatively, you can modify Brake Sensitivity in-game to lower than 50% (try 25%) which will give you more pedal throw length to push into before the actual braking pressure reaches over 50%.
    - GTR2's 25% Brake Sensitivity is similar to iRacing default 1.80x Brake Force Factor which is designed to help throw-length-based, potentiometer pedal users because they have almost no muscle pressure to gauge brake pressure by.

==